Beginning to Back Carry
When is it safe to begin back carrying with a sling? This is one of the most frequent questions I am asked and I usually answer with more questions, as there is no one single answer!
Children have been carried on their parent’s backs since the dawn of the human race, because it is a simple and convenient way to carry a child around as you get on with daily life. Families in different cultures from our own tend to share parenting skills and knowledge within the community, so there needs to be no formal teaching, it is just what has always been done and everyone learns how to do it from observation and previous experience (siblings often carry new babies). Babies in traditional families are back carried in pieces of cloth from a very young age without any fuss. It is normal behaviour, and allows meals to be prepared and water to be collected while baby sleeps peacefully in a safe place.

This is a very different way of doing things than in our Western culture, where we have lost much of the communal family life we once had, and parenting skills are no longer passed on in the same way. These days, we need to learn about how to care for our newborns from other sources than our local neighbours; we create virtual villages with social media, rely on organised groups of mums and look on the internet for information about feeding and sleeping. Carrying methods are just the same; infants are not routinely carried in slings and thus we need to ask for advice. This is where sling libraries and consultants are so useful; they are parents who have discovered carrying skills for themselves, honed and practised these skills, and wish to share their expertise with other parents so that carrying can be promoted – carrying children matters.
Front carrying is the most common position for young babies; central or slightly off centre, as this mimics natural in-arms carrying that babies enjoy so much. The closeness and sight of your newborn promotes oxytocin release (vital in attachment) and adds a measure of confidence for you, being able to see any changes in breathing patterns and allow quick and easy rearrangements if needed).
Back carrying can be a particularly contentious issue in Western culture; nobody seems sure what the “rules” are and lots of different advice can be given out.
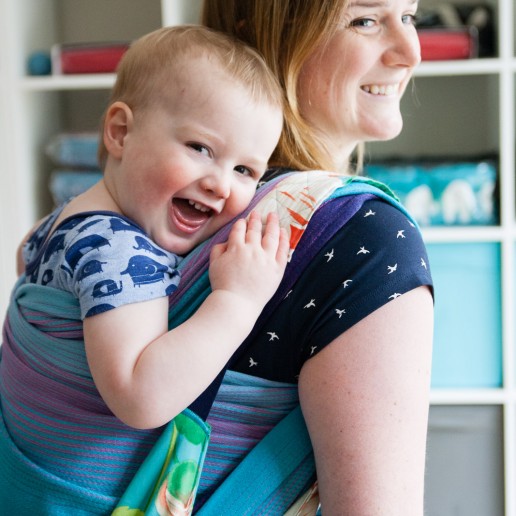
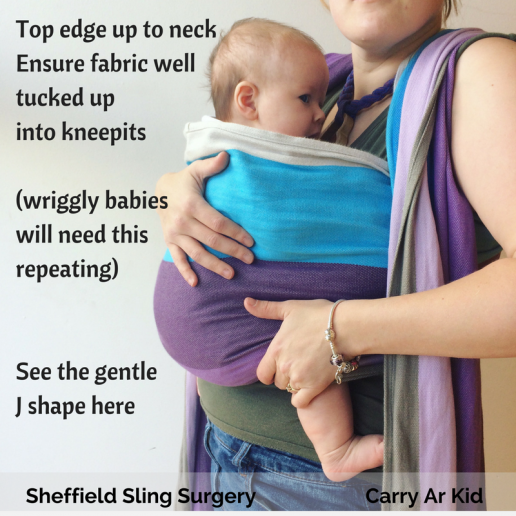
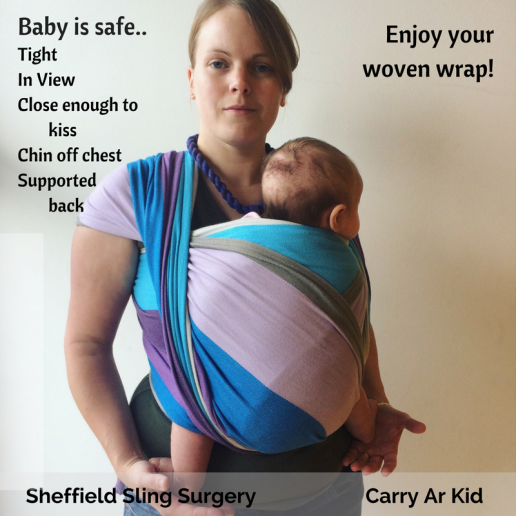
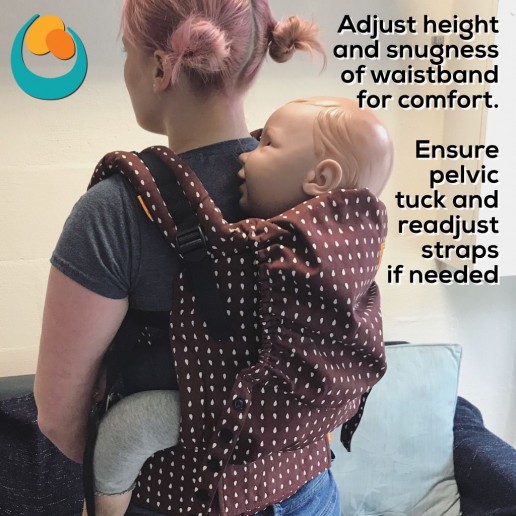
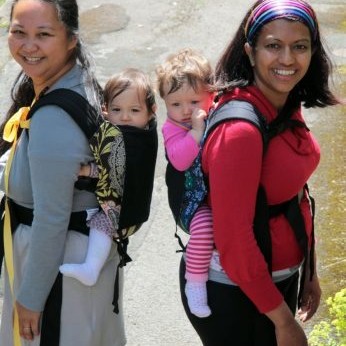
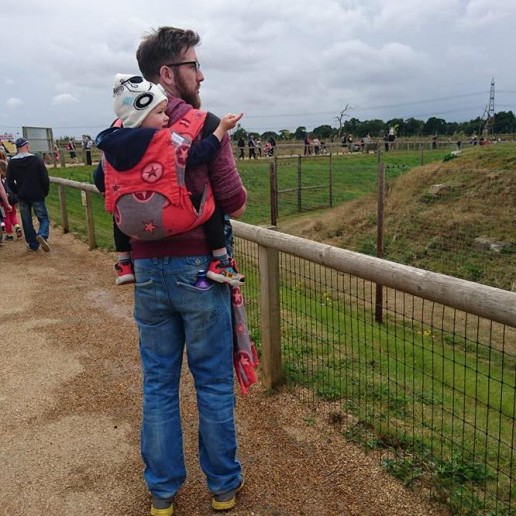
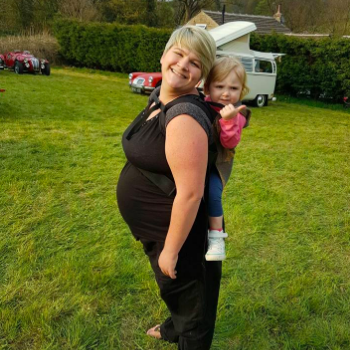
Back carrying can be done from almost any age, with appropriate care and caution for protection of airway and spine, and with the appropriate sling to facilitate this safe positioning (see the position image). Quite often, parents who have learned how to back carry older children will feel more ready to begin this with their new babies at an early stage, if they want. However, you can learn to carry your first baby on your back and there will be support from professionals if you need it – it can make a big difference, having a guiding hand as it can be scary! The more confident you are with handling your baby and your carrier, the easier it will be.
Not every type of sling is suitable for back carrying. For example, while some buckle carriers do carry newborns very safely on the front, they are usually snug and high up on the chest (close enough to kiss) and any changes in airway position can be quickly seen and corrected. It is much harder to monitor your newborn baby in the same buckle carrier on your back (which will usually end up quite low) and to be sure that your baby is properly supported inside the panel without any slumping over or chin sinking onto the chest. (This is due to their immaturity and greater muscle fatiguability even when they have some head control). Most buckle carrier manufacturers will state their minimum age for using on the back and it is wise to respect this.
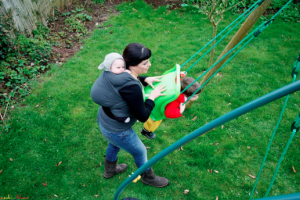
Some stretchy wraps can be used for back carries (see here for more) if they are designed to do so and have been appropriately tested. It is a common myth that you should never use a stretchy for a back carry, however they can be very hard to do well. It requires skill and this is best learned from someone who knows how to do it, for safety. Some people will choose to use a different carrier that they find easier or more convenient.
Let’s look at some common questions around back carrying.
Can I carry my newborn baby on my back?
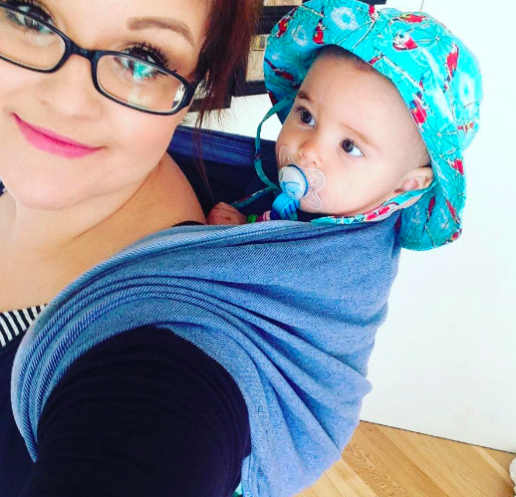
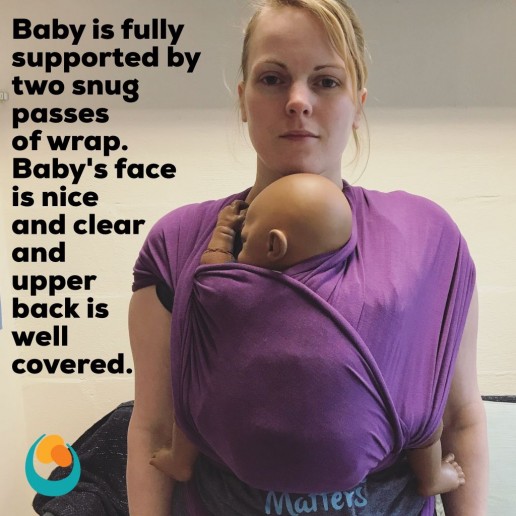
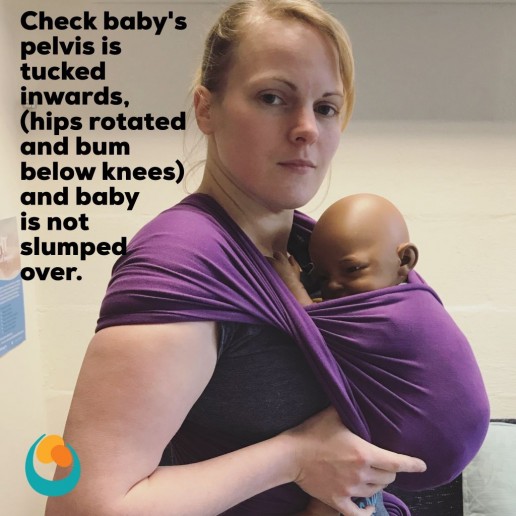
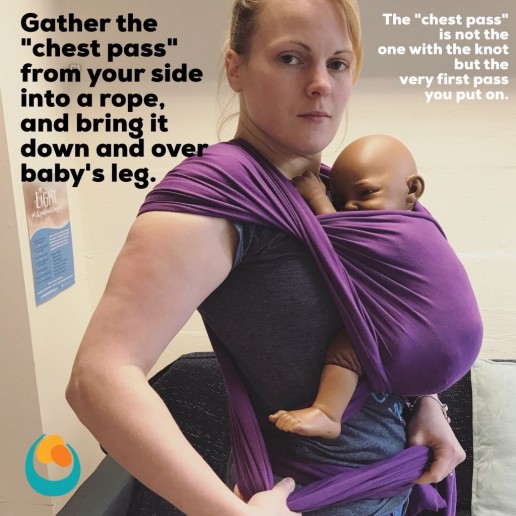
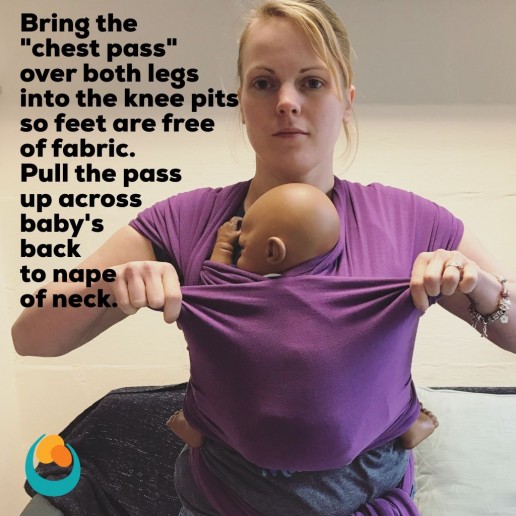
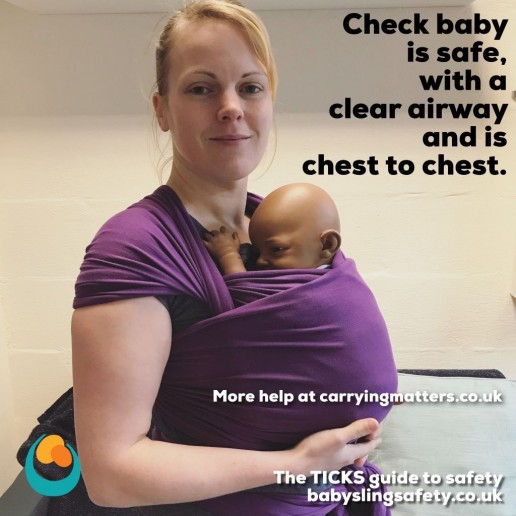
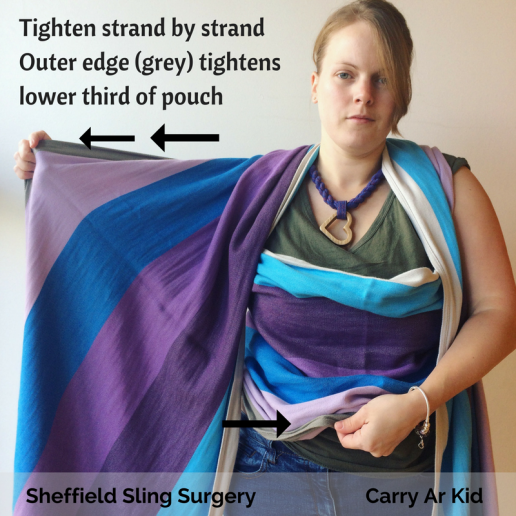
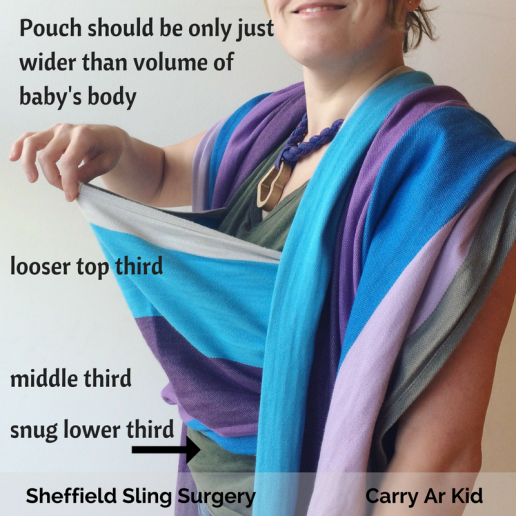
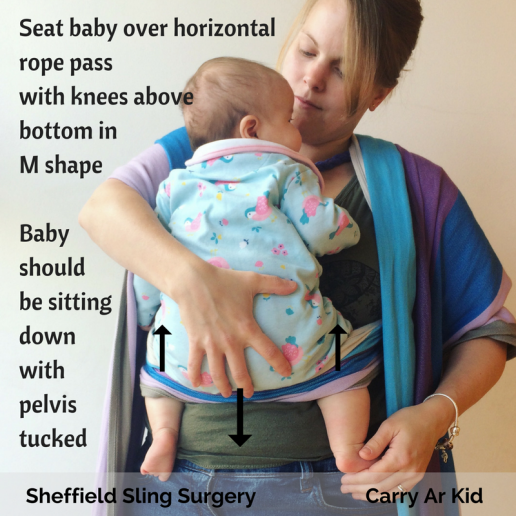
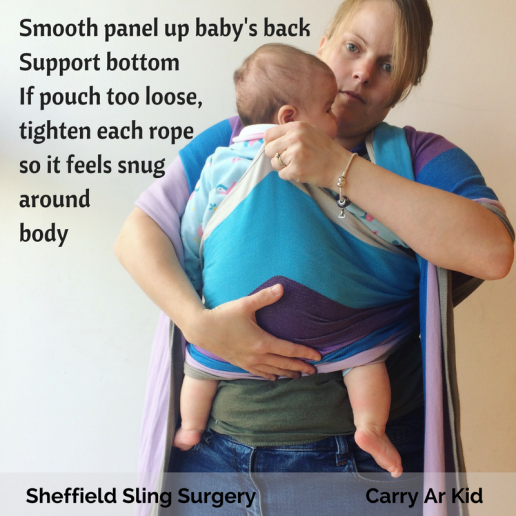
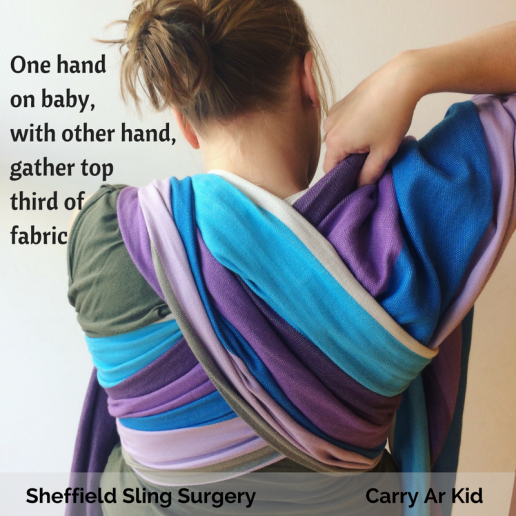
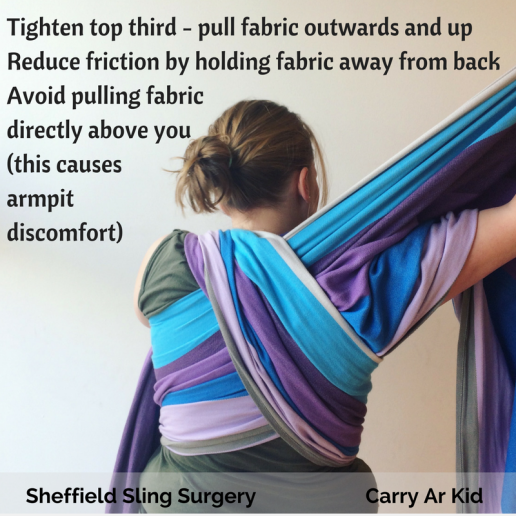
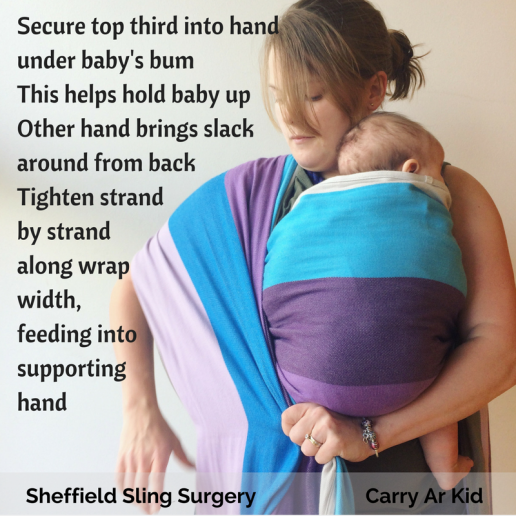
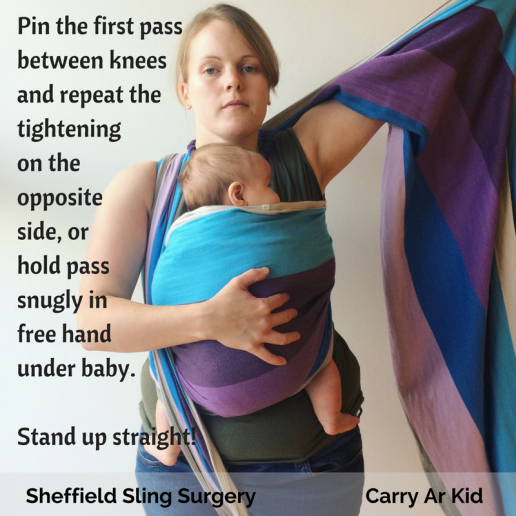
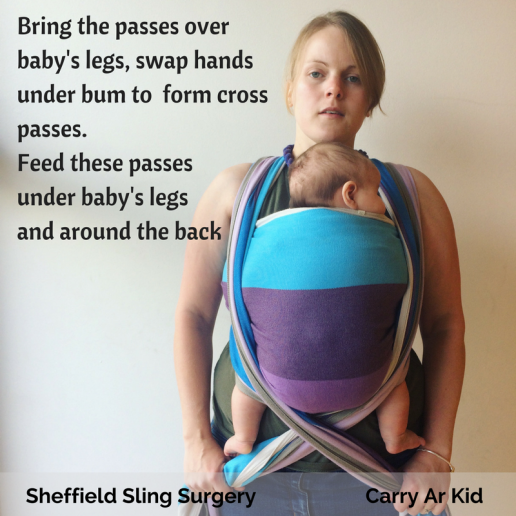
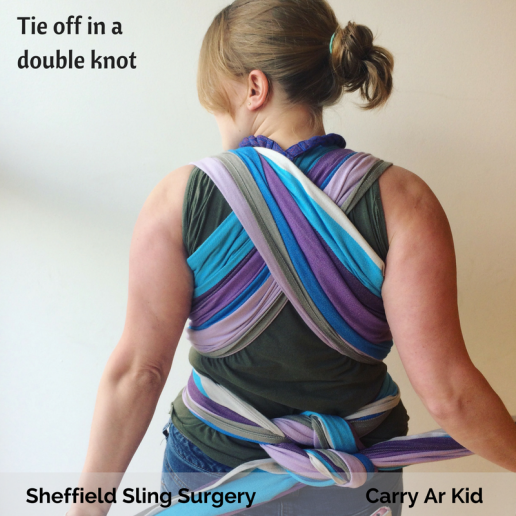
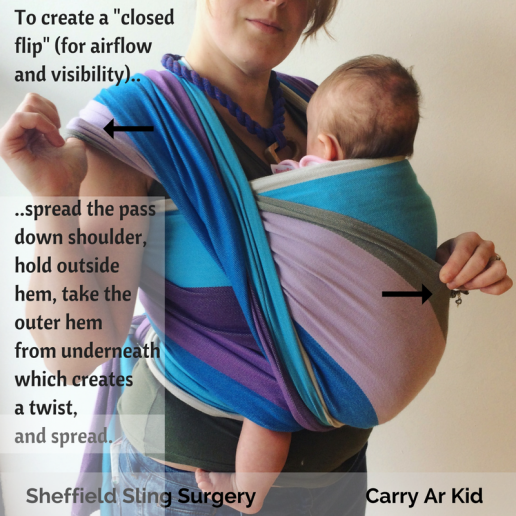
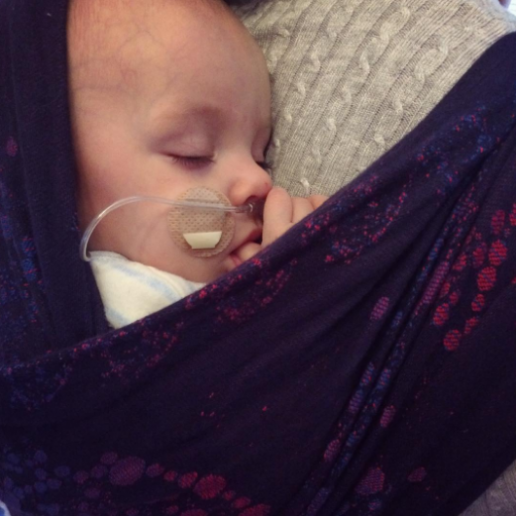
Yes, newborns can indeed be carried safely and comfortably. They will need frequent feeding and changing, but many will settle happily to sleep in a back carry. The safest way to do this is usually with a soft and floppy woven wrap. This is because woven wraps are a collection of individual strands and can be carefully tightened section by section to ensure your baby is fully supported from neck to kneepit, with the airway open, spine kept in the physiologically appropriate gentle curve and knees just gently apart to preserve healthy hip positioning. Such back carries are usually done high up on the parent’s back, so they are able to see their baby’s face and feel their breathing on the back of their neck. Most people will choose to do the simple rucksack carry, as the ruck pass doesn’t overspread the hips, and the single layer doesn’t drag fabric at an angle against the back. (Some babywearing schools will insist that this is the best carry to use for the first six months; other schools of thought are more flexible, but on the whole, ruck carries do work best for very young babies). Getting baby up onto the back can be a challenge; the Slingababy video below shows one way to do so safely.
Some very mouldable mei tais (usually made of wrap fabric for the mouldability and control) can be used for back carrying young babies too.
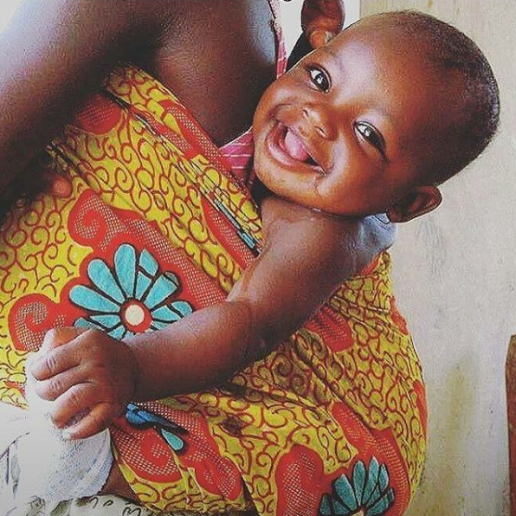
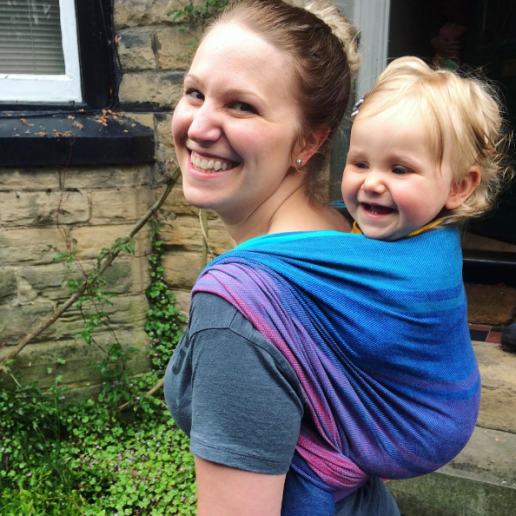
Older babies can be carried in wraps lower down, as in the African pictures above, as the fabric moulds around them properly. It is a common myth that all babies are best off in a high wrap back carry, or that they are safer; it is all in the positioning and skill to keep their airways open. Many parents find lower back carries can be more comfortable than higher ones, especially if they have back pain. It is worth trying a few carries out to see which works best for you and your baby. Videos from trusted sources can be useful, however, not every video on YouTube is a good one; some neglect basic safety checks, and not everyone finds videos an useful way to learn things. Your local sling professional should be able to support you!
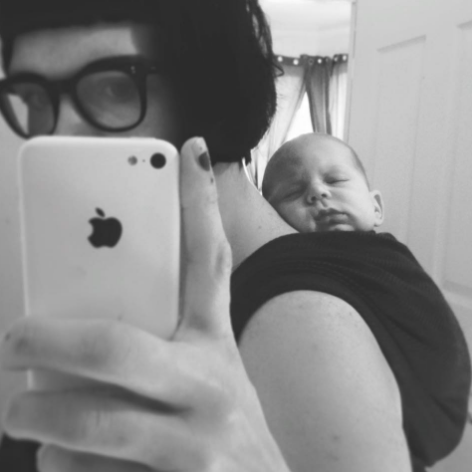
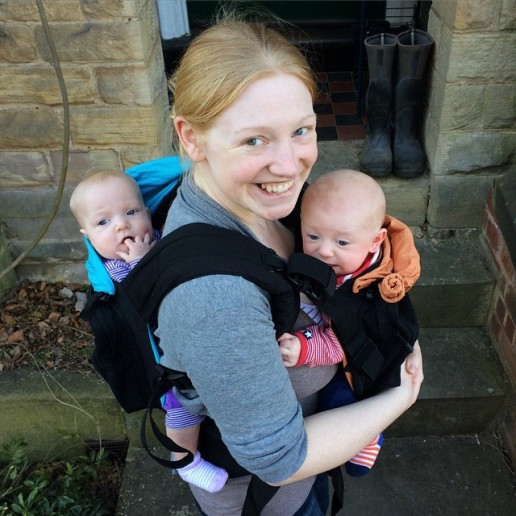
When can I put my baby on my back in a soft structured carrier? (eg meh dai, full buckle carrier)
There are no real “rules”. “Rules” are often misunderstood/misinterpreted and can cause needless delay. It is worth noting that most structured carrier manufacturers will have guidelines regarding their use for different positions, and it would be wise to read these to ensure you are within warranty. Every parent needs to make their own decisions regarding when it becomes appropriate to back carry, weighing up their need/desire to back carry with considerations for safety and security. All carriers must provide enough support to prevent slumping and airway compromise.
On the whole, most people feel that the best time to begin back carrying in structured panelled carriers (that may not mould in the same way as a wrap or floppy mei tai and are unable to provide neck support to heavy heads, and generally sit quite low down on the body rather than keeping babies high up near the parent’s neck) is when baby’s upper body and torso muscles are strong enough. They need to have enough endurance to be consistently able to support themselves and hold their heads upright for a significant amount of time without tiring. This typically occurs when babies are beginning to sit unaided (or nearly). This commonly happens around six months, on average – it varies from child to child.
Some children may take longer to develop upper body control, but their parents may be struggling to carry them on the front; do go and see your local sling specialist who can help you find some solutions to this problem and keep you carrying. Generally, if the carrier fits your child properly and provides the necessary support, you can back carry in it. (This will apply to children with disabilities for example; it can take longer to gain head control but back carrying may be important. The right carrier that fits well and is used optimally may work just fine; do go and get some help!) Read more about back carrying children with special needs here in a fantastic article about ableism in the babywearing community.
Some parents will feel the need to back carry a little earlier, for example, parents of twins. The TwinGo carrier suggests that their carrier is suitable for babies of 4months plus, with “strong and consistent” head control. Of course, this control comes to some babies sooner than others, and factors such as the size of your baby and the width of the carrier may play a part in decision making, as well as the presence of other adults for support should your baby need some help.
It is possible to monitor your young baby’s safety on your back with useful items such as mirrors, plus you can often add head and neck support using the hoods. Don’t be afraid to ask a professional for help!
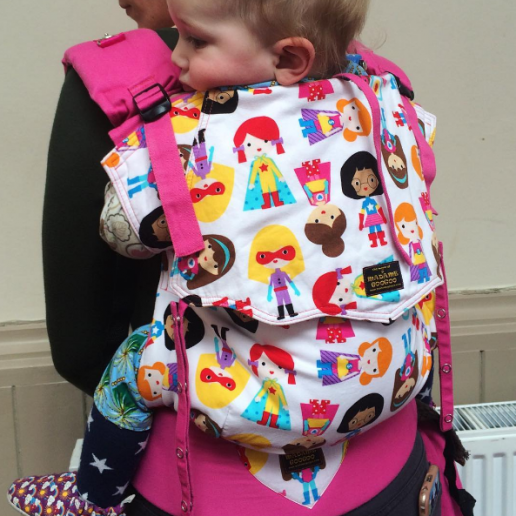
How can I get my baby on my back?
This usually depends on the carrier you are using, and your levels of confidence, and the community you are part of. If you have grown up watching your family carry babies, it will feel like second nature – but if not, this is where getting advice and support can be so very useful.
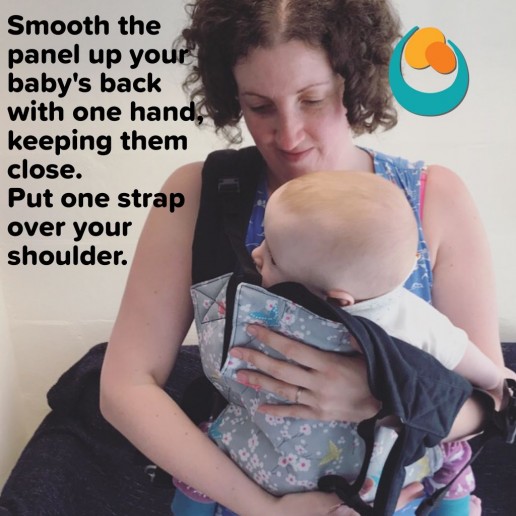
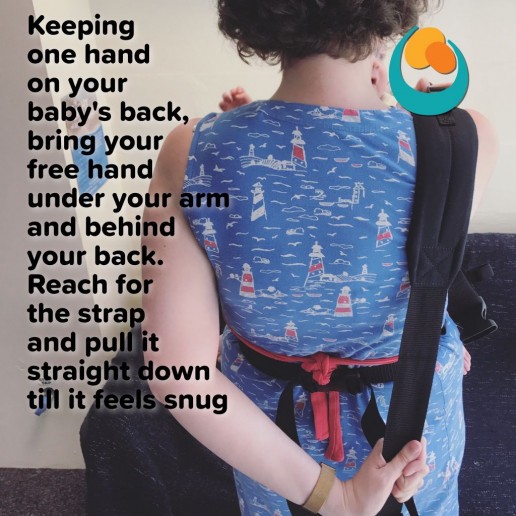
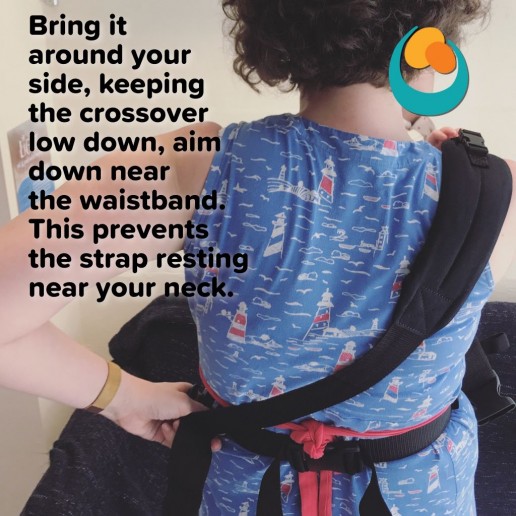
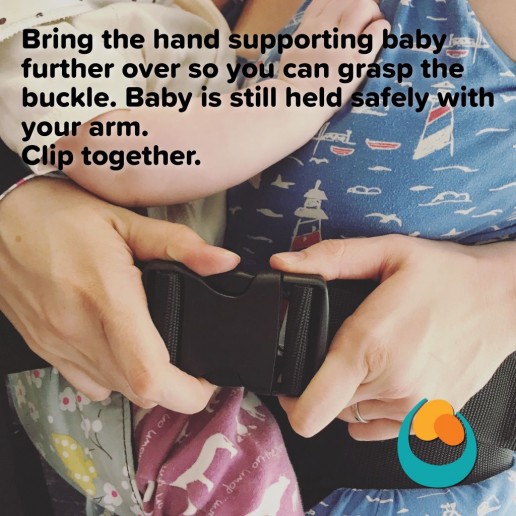
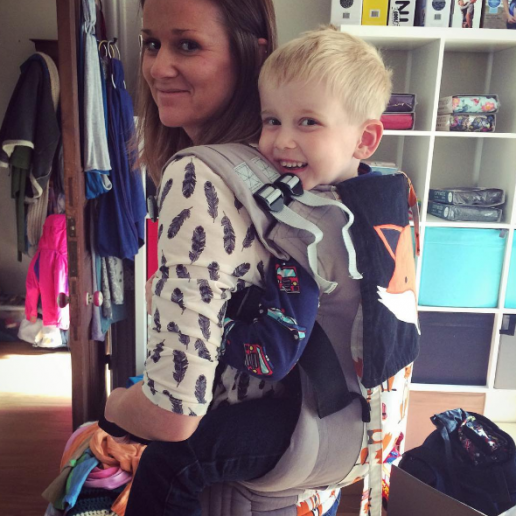
Back carries with buckles and meh dais are relatively straightforwards and there are many ways to do it. Some manufacturers will have very simple instructions (which may not always be the most easy to follow), and there are videos on YouTube. It is always best to look at videos with a critical eye to see how well it is done, and those made by trained professionals who are used to making videos are usually the most reliable. My back carry with buckle videos may be useful here – at no point is baby or carrier unsecured.
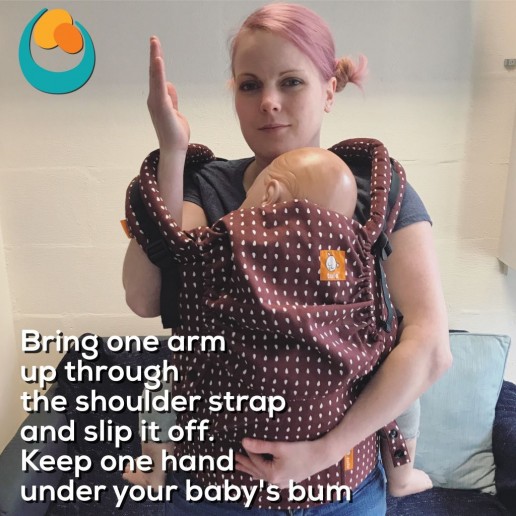
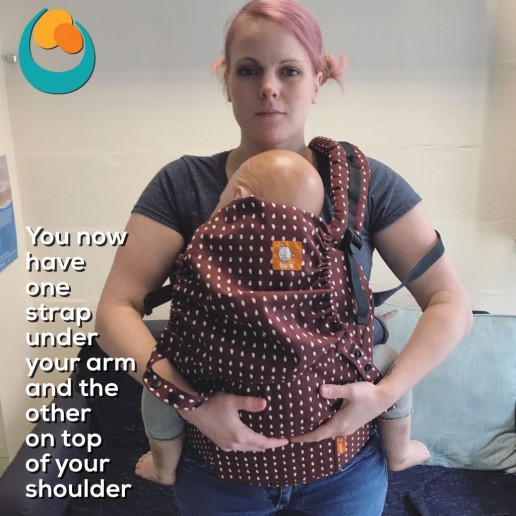
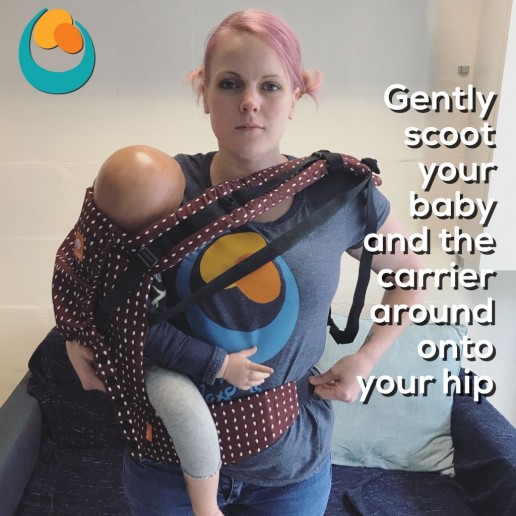
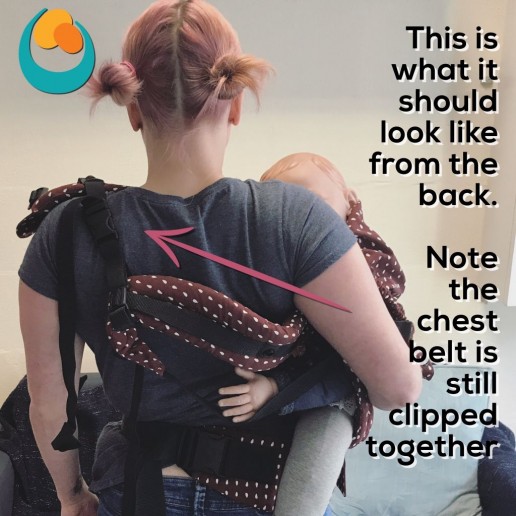
Here is a link to my photo tutorial for the “one up one down” method.
The key thing is to know your carrier and know your child. Being familiar with the buckle placement or or how to tie knots/tighten webbing is important. If you have a willing child who will comply with back carrying, it will be easier to practice, however, if your child is very unwilling, it may be best to wait for another day. You may be able to distract your child with a small toy as you go, and mirrors are useful so they can still see your face if they are not used to seeing the back of your head and wonder where you have gone!
Your local sling resources will be happy to teach you and this may be a very good way of rapidly improving your technique and confidence.
Back carries with a ring sling can be very useful, especially as the “seat” of the carry is created on the front or side of the parent, and then shifted around to the back. There is a knack to this, and also several ways to make the carry more secure and comfortable.
Back carries with woven wraps can be more tricky, as the fabric needs to be tightened around the child bit by bit, and again, a willing child is a blessing for those learning how to do it. The age at which you start will influence your choice of method; most experts will suggest a bundled “santa toss” with the baby already secured in the pouch for newborns, as this is the most controlled and safe way. Of course this will depend on your previous experience. Older children (3months plus with hips opened enough to sit on the hip), can also be put on the back using the hip scoot. Over the shoulder “superman” tosses are popular, it is wise to ensure you are fully supporting your baby by their shoulders, rather than holding them only by their arms (which can put some pull strain on shoulder joints). It takes practice to do it well – even seasoned babywearers who feel confident can find back carrying with a woven wrap a challenge, and none of us get it right every time – the “wrapping mojo” is real!
I really do recommend seeing a professional to get some help and teaching if you are planning to back wrap a young baby, as there is a lot to get right. For example, the correct tension to support neck and airway for safe breathing, getting it snug all round to avoid baby slumping to one side or slipping down inside, and getting the right amounts of slack out at various points to ensure there isn’t too much tightness around the neck and the knees which can leave red marks. Some people do teach themselves to back carry with videos and manuals and with their peers, but there is no harm and much to be gained from trained support (just the same as getting support with breastfeeding, or learning to drive a car – an instructor will probably help you to be ready for your driving test sooner than a non-professional.) I have some videos here which I feel may be best as reminders.
Back carries can be useful for pregnant mums, once the bump gets a bit too big for front carries, or if pelvic pain strikes, making hip carries hard (these are best limited if possible anyway, to avoid uneven loading of loosening ligaments). It is wise to build up your strength and tolerance for carrying as your body changes; little and often is key.
In summary, back carrying can be great fun. It is challenging to do well, and takes practice, however, once mastered and done safely, it can be very satisfying, and for many, it adds a new lease of life to their carrying journey. I do urge you to seek the services of teachers to help if you are finding it hard, or uncomfortable – we are here to support you and empower you to keep on carrying!
And don’t forget; sometimes front carries are just as lovely!
Beyond the "Knee to Knee"
How much does it really matter to have a carrier that fits from one kneepit to the other? Read on for a discussion of this topic that moves beyond the knee to knee.
Quite a few people visit my sling library on the lookout for toddler carriers, as their little ones are “no longer knee to knee” in the sling that they
In Sheffield the problem arises particularly in relation to Sleepy Nico baby carriers, which are very well loved here. People are reluctant to move into other carriers that may not feel so comfy,, but don’t wish to hurt their children or be unsafe by using a sling that may be too small, or moving to a “toddler size” that may actually be too big!. There is a lot of conflicting information on the internet about the sizing of carriers which many people find very confusing to navigate….
SO…
1) What is knee to knee?
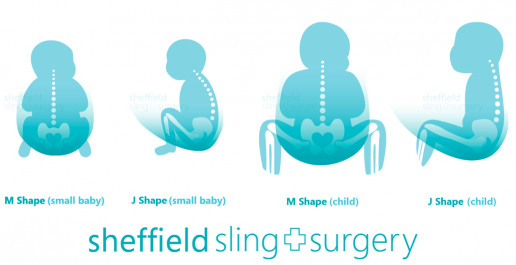
Knee to knee simply means that the carrier you are using supports your child across the full width of both thighs, from one knee to the other, reaching into the knee pit. This ensures a comfortable seat for your child, more like sitting in a hammock, than perching on a stool. The diagram below shows a carrier that is reaching knee to knee, and the side on view shows how this will create a comfortable seat.
Having the knees raised above bottom also increases flexibility at the hip joint and makes it easier to flex and extend. Try it yourself! Sit astride a chair, facing the back. See how easy it is to shuffle forwards, keeping your legs flat on the chair seat, to get your symphysis pubis (the front pelvic bone) to touch the back of the chair. Those of us with lovely flexible hips who can do the Buddha position easily will find this a doddle, but others of us will find it a little sore as the ligaments get strained. You can release this tension instantly by bringing your knees up above the level of your bottom, and this will often tuck your pelvis inwards, bringing a little curve to the base of your spine. This position you have created is called the M shape, for obvious reasons, and is the ideal position, supported knee to knee with bottom a little lower. There are a few circumstances where this standard recommendation may not be appropriate, and more care will need to be taken, such as children with hyperextension conditions, or achondroplasia for a start. If you are at all unsure, do see your local sling and carrier consultant or ask for advice from trained professionals. We are always happy to help with tailored advice! For more information if a narrow based carrier will harm your child’s hips, see my “Healthy Hips” article.
2) What if my carrier seems to be no longer knee to knee?
There are usually several factors to consider here, depending on the age of your child.
Firstly, is your young child sitting in the M shape, with their bottom sitting deeply in the panel, and knees raised up with pelvis tilted? This often makes a big difference to how young children sit in carriers, and you may find it instantly makes things more comfortable for you and your child, especially if the panel has also previously felt too short. It is worth taking your time over positioning your child really well and may extend the life of your carrier for some time.
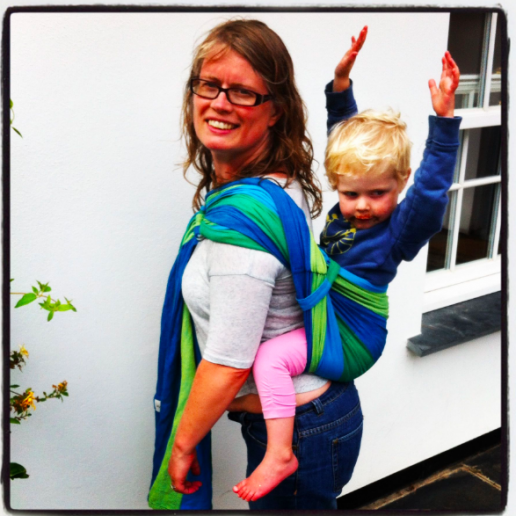
Older children who can stand and walk do not need the same level of support and will be fine if the carrier offers them good thigh support. It should keep them in a comfy seated position with lower legs bent at the knee, at right angles is fine. Older children have more muscle strength and co-ordination, and can help to grip on, so they do not need full knee to knee. They need more space and freedom to move, and will want to get down more often anyway! In this photo the sling is not reaching to the kneepit but to mid-thigh. Just make sure there is no digging in of the fabric along the thigh, and no pinning of knees with wrap fabric passes.
Secondly, is your child central in the carrier? I find that people have a tendency to hold their children slightly off centre when in arms, and then bring the panel up from that place so the child remains in a similar off-centre position. This will mean that one leg is less well supported than the other, and can lead to leaning and discomfort. Keeping a child central will often improve comfort both for your child, and for you.
Thirdly, is your child comfortable or not? Older children may be able to tell you, but for younger ones, our role as parent is to be caring and careful, and aware of non-verbal communication. Sling users usually worry (in the early stages with small babies) about over-spreading hips, as babies cry when they are uncomfortable, and children vary in their hip flexibility. This is why many carriers are “cinched” in when they are too big. Always listen to your child. If they are comfortable, and happily able to move their legs at the knee, and legs do not seem to be dragging down but are well supported, you may not need to size up just yet.
Fourthly, is your child growing taller as well? This may be more of a problem than the width of a sling if a child has a very long body and is able lean back too far from a panel that is too short. If your child leans back too far they may unbalance you. Keeping yourself and your child safe is more important than being knee to knee.
If your child is happy in their current carrier, that is good news. If they are not, and legs seem to be dangling unsupported in more of an A shape, or they are able to lean back, it may be time to consider another, bigger carrier. It might help to look in the mirror to assess your child’s leg position and how much back support they have.
3) Is it unsafe to use a carrier that is too small?
It depends on the child, and the parent! As I have pointed out in my Healthy Hips article, there is little evidence that a “narrow” seat will be harmful to any child beyond the age of six months, and even before then, the risk is low. So an older child, especially when they can bear their own weight on their legs, is not at risk of damage from not being perfectly knee to knee. They may not be as comfy as they could be if the carrier is very small and they end up with legs dangling in an A shape (this could be tiring for a child, and lead to red marks on the inside of the thighs). Let your child be your guide. I usually suggest that a carrier that supports at least to mid-thigh and allows a comfy seat with knees at right angles or a little less for older children, is fine to use.
Many big brand carriers such as Beco, Boba, Ergo and Manduca to name just a few, say that their carriers are safe to use well into toddlerhood, long after some people would feel their babies were too big for them (they are all formally safety tested). Sometimes it can seem that people are in a hurry to move out of a “standard” size carrier, before it is really necessary. Again, check your positioning, and do get some help from your local sling consultant/peer supporter/library/sling meet if you are unsure. One size does not fit all, some babies are big, some toddlers are small, some parents find bigger carriers more comfy for them, some parents find smaller carriers work better for their frames. Each carrier has its own specifications too. Some are narrow, some are short-panelled, some are wide, some are tall, some have buckles that insert very low and can squash baby thighs, etc. It is all dependent on the individual situation, and what works for one baby and parent may not work for another. Skill levels vary too, as does child compliance – a contented baby may be happy for the parent to take the time to maximise positioning, others may resist.
If you have a half buckle, or a meh dai, there are ways to tie the shoulder straps to come beneath the child’s knee, to further extend the width of the support offered by the panel itself.
4) Is it unsafe to use a carrier that is too large?
This is a more complex issue. The crucial issue to consider is child safety, based on the ABC and the TICKS guidelines. A child should not be invisible inside a carrier that is too tall, as this could be a risk to their airway and their breathing. This is one reason why many carriers have inserts, to raise children higher up the panel so their faces are visible at all times and chin can be kept off chest. I would rather see a child that was in a carrier slightly too short in the body, than in one that has too tall a panel.
As for the width and knee to knee…
A carrier that is too wide will make a child’s legs stick out straight, or he will strain against the fabric to bend his knee (which may lead to red marks, even if no voiced complaint at the time). He may feel some strain at his inner thigh if he cannot bend his knee in this hip-extended position (see the chair illustration above). Sometimes it can be suggested that the panel could be “cinched in” with something like a webbing belt, or a ribbon, etc and this may, if there is no alternative, make the carrier much more comfy as he is now able to bend his knee in the M shape. However, this will invalidate the warranty of the carrier and place strain at the waistband.
Also, by bringing the knees up higher, the angle that the hips need to open at the groin is reduced, as the joint is able to rotate more easily. *Please note that this is a hack that is rarely recommended ; if it is not in the instructions it will invalidate any warranty.*
Summary
Every parent, child and carrier combination is individual, and needs assessing as such. Many carriers that are not knee to knee may well be able to be used for your child for longer than you might expect, so there may not need to be a great rush to size up. Buying new carriers for many is great fun – if you are going to buy something too big for your child to grow into, do ensure it is comfortable for them, and not too tall. You may have more time in your current carrier than you think, to give you time to find the next carrier (if needed).
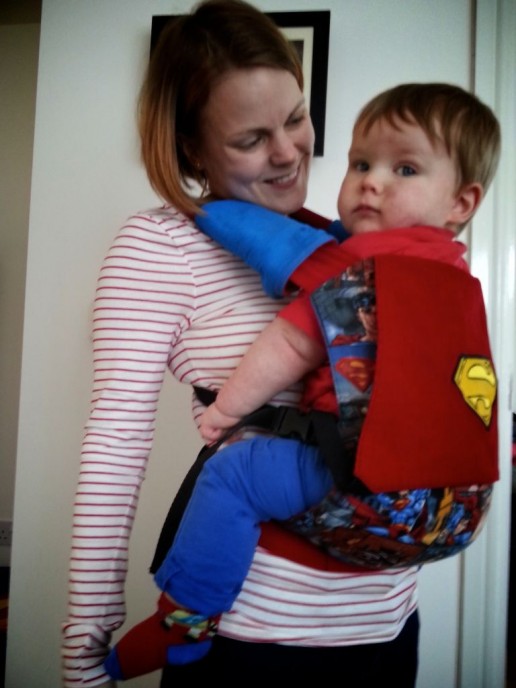
But what about the Superman Sleepy Nico at the start? Is it OK? I think we can all agree that the little SuperBaby will be OK to enjoy his special carrier for a while longer yet.
The Pelvic Tuck
What is the pelvic tuck or scoop?
I am often asked by carers who want to carry their children safely and comfortably “what is a pelvic tuck and how do I do it?”
Babies are born with gently curved spines, and usually prefer to rest in this tucked posture when they are relaxed. Arching the spine and “starfishing” can (for some) be an attempt to communicate discomfort or distress. Sleeping and relaxed babies can usually be found with their knees drawn up into a comfortable “M shape”; this is normal behaviour, and it is how most babies rest on their parents, perching on the broad secure base of the carer’s forearm. From this broad base, babies’ chests can be properly supported against the parent’s body, thereby avoiding slumping over and restricting airways.
This “squat” positioning also helps to encourage healthy hip development. Studies have shown that the rates of hip dysplasia are lower in communities that carry children on the hip or back frequently, as the posture adopted for this promotes optimum growth of the hip joint. (see here for more information on hip dysplasia and slings).
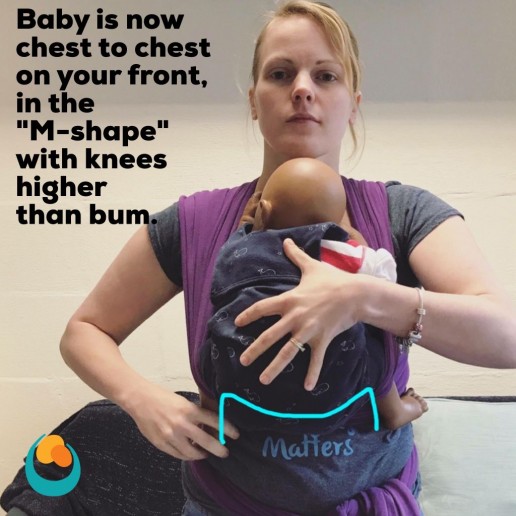
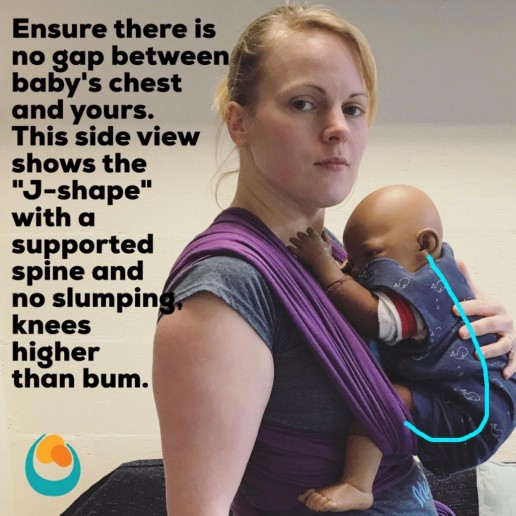
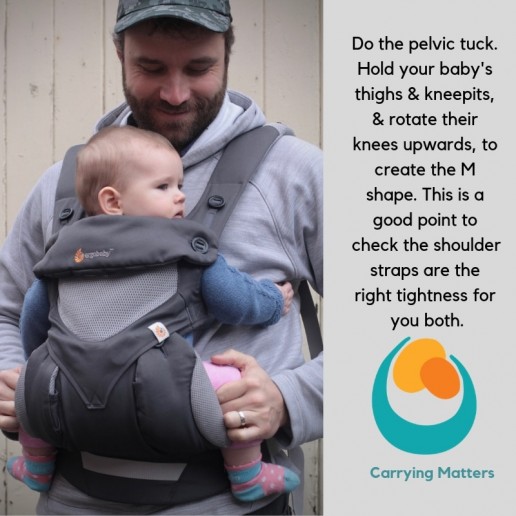
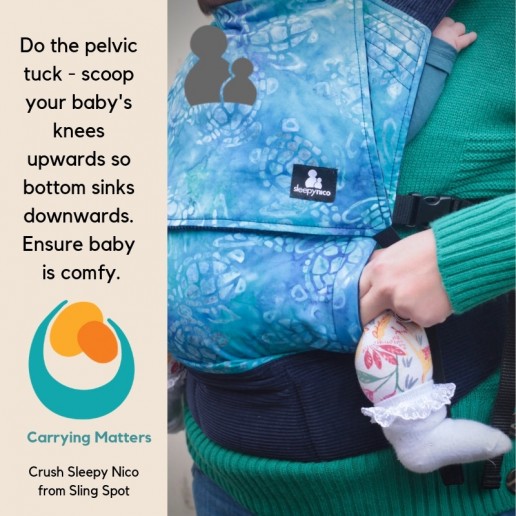
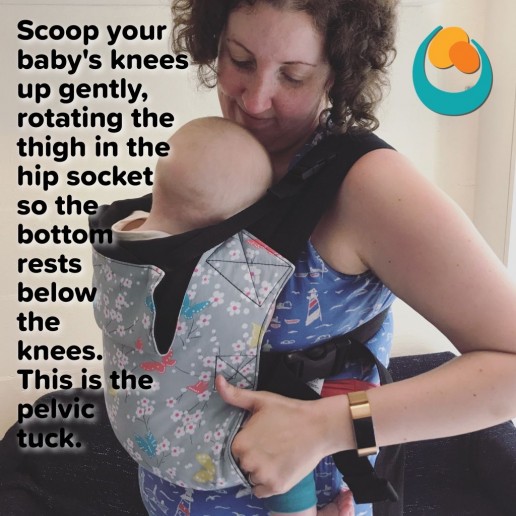
The pelvic tuck/scoop technique of encouraging a child to sit in a position that creates a “J shape” (from the side) or an “M shape” (from the front) in a carrier is therefore very helpful. Such positioning is more comfortable, more respectful of anatomy, and also helps preserve open airways. The aim is to raise the knees up, allowing the bottom to settle downwards into the classic “M shape”.
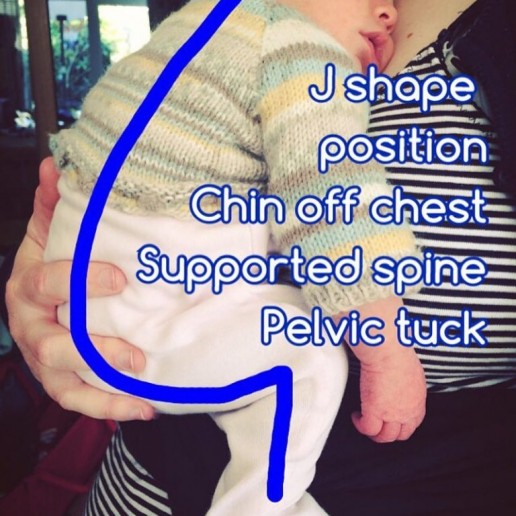
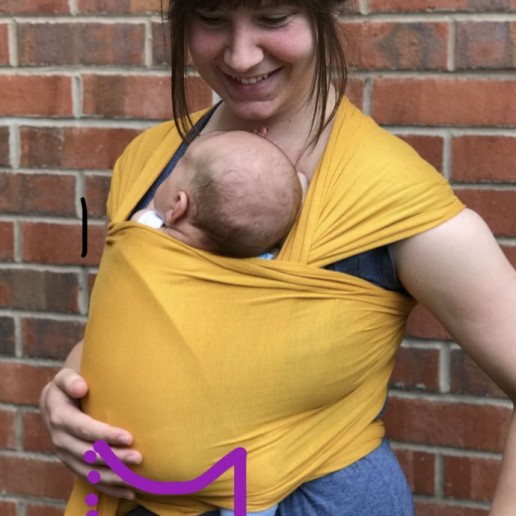
When demonstrating, I suggest that carers imagine they are scooping two curls of ice-cream towards themselves with both hands; and then repeat this action as they hold their child’s thighs gently between thumb and fingers. Another way of thinking about it is to imagine they are holding two glasses of water in front of themselves, and then pour the water out away from them.
This rotates baby’s femoral head in the socket. The photos and videos below show this in action.
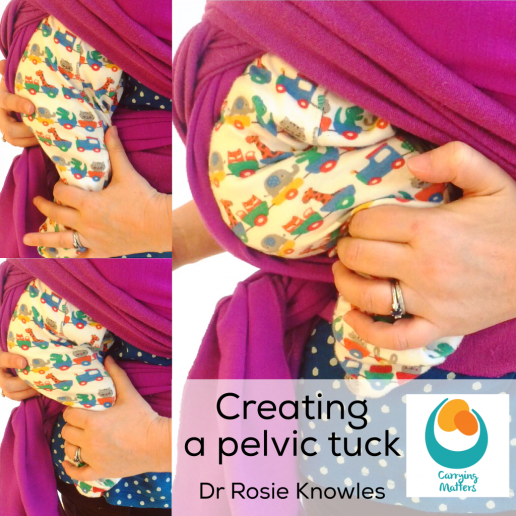
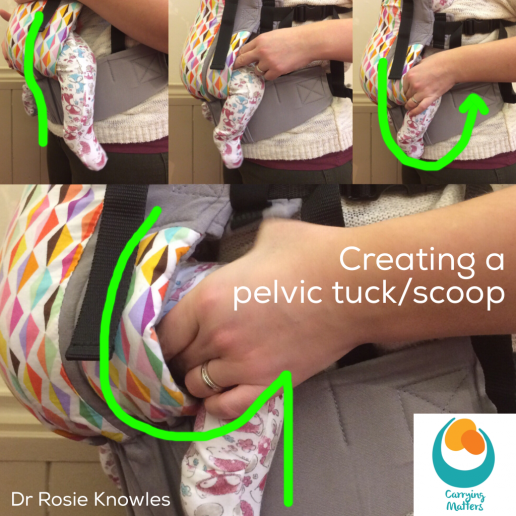
Creating this broader base seat for a younger child will also help to make a narrow base carrier more comfy and feel more stable and supportive. A simple scarf can be used to support the legs in this “M shape” once the pelvis has been tilted and knees raised above bottom.
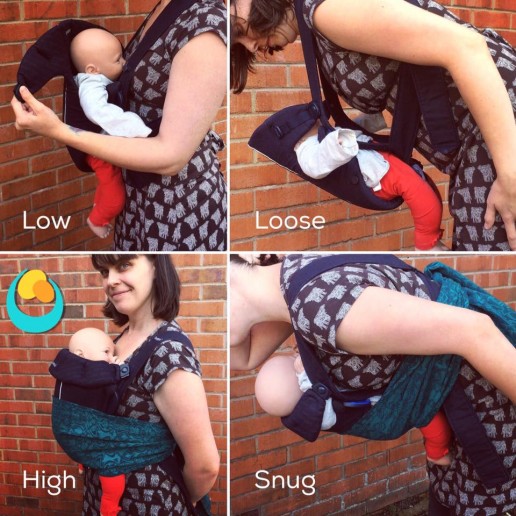
The pelvic tuck is less important for older babies and toddlers; as children get older, the ability to actively move around in the sling becomes more important while they are awake. The key thing is to ensure they are comfortable and their legs are not dragging down or tiring them; the carrier no longer needs to be knee to knee for older children.

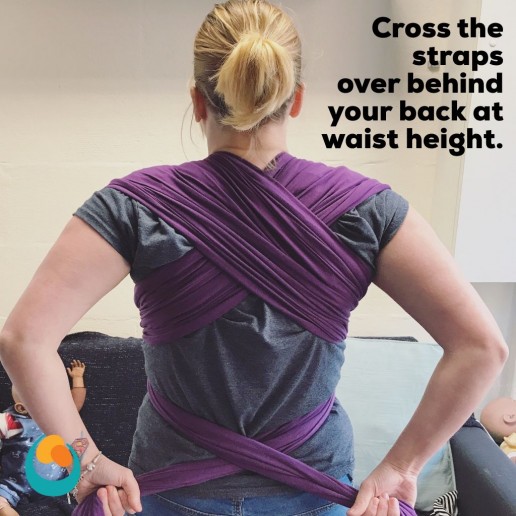
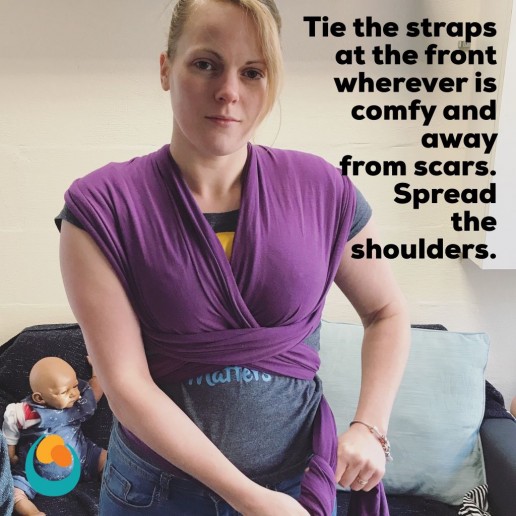
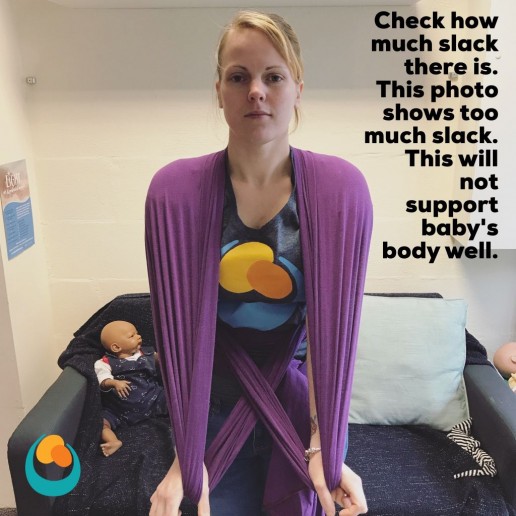
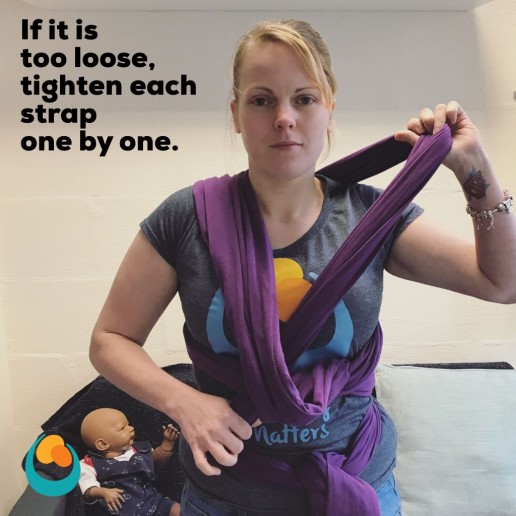
Stretchy wrap photo tutorial guide (two way stretchy wrap)
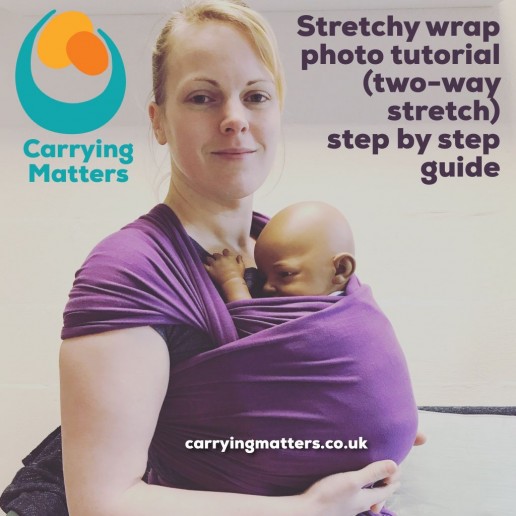
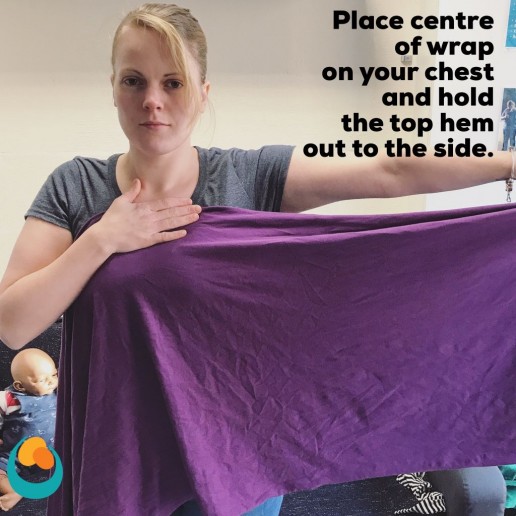
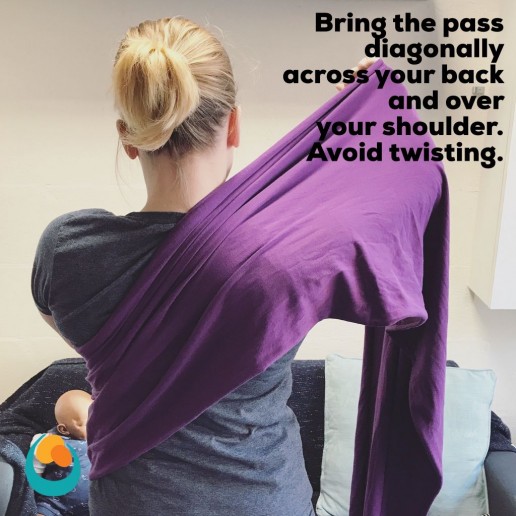
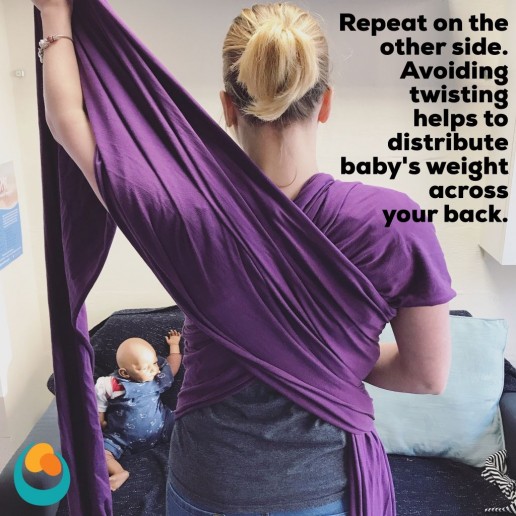
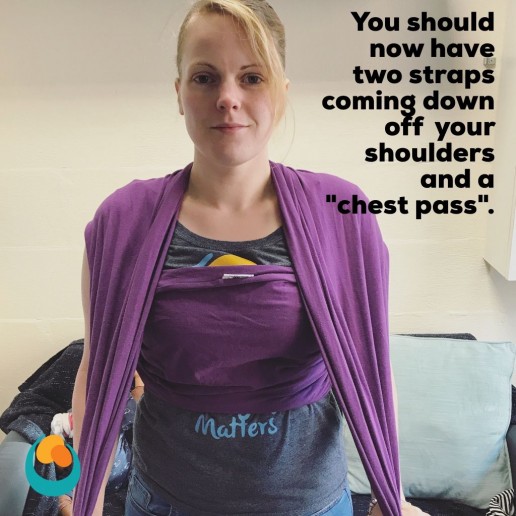
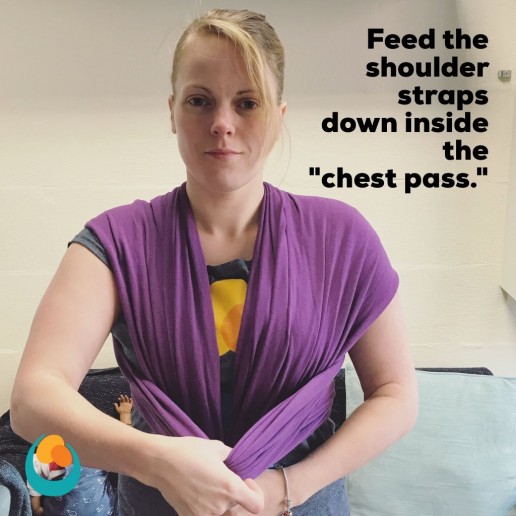
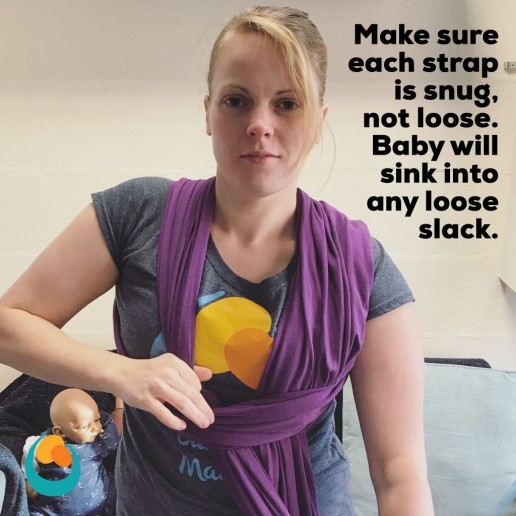
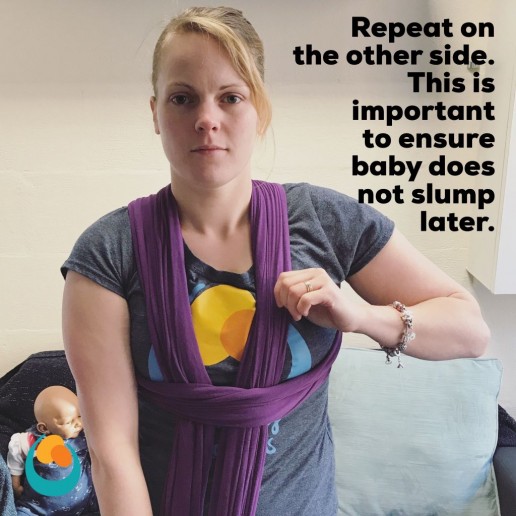
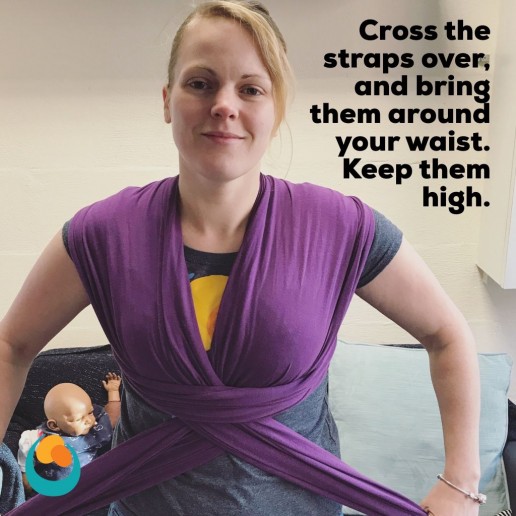
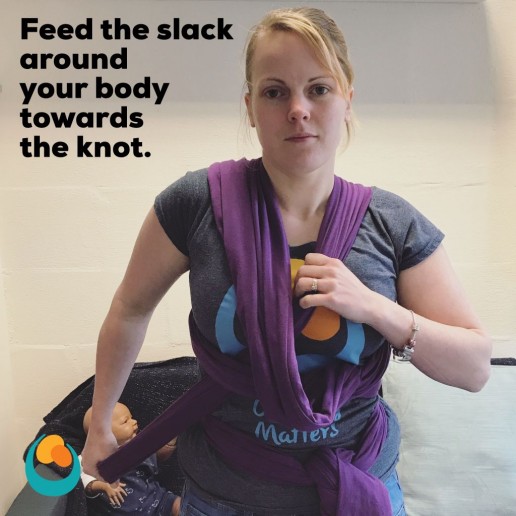
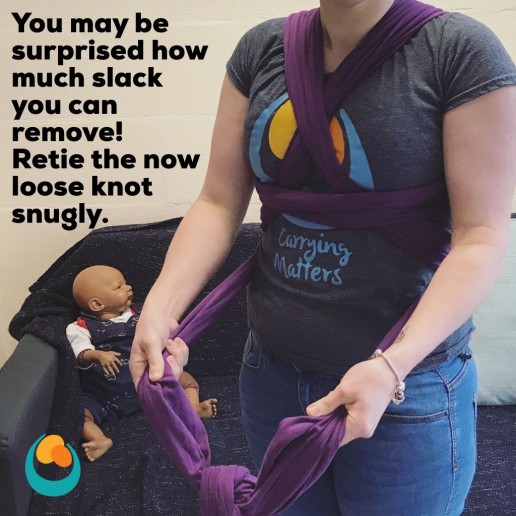
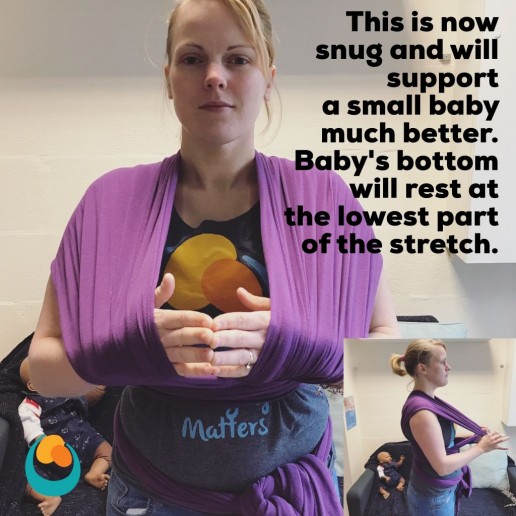
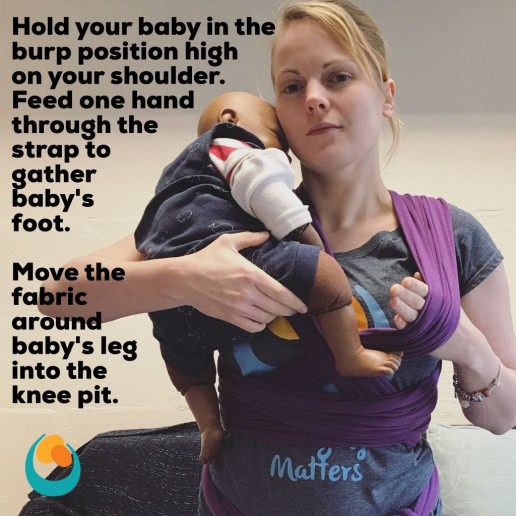
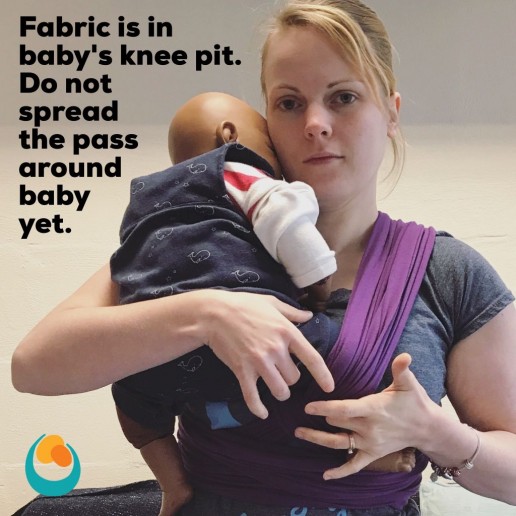
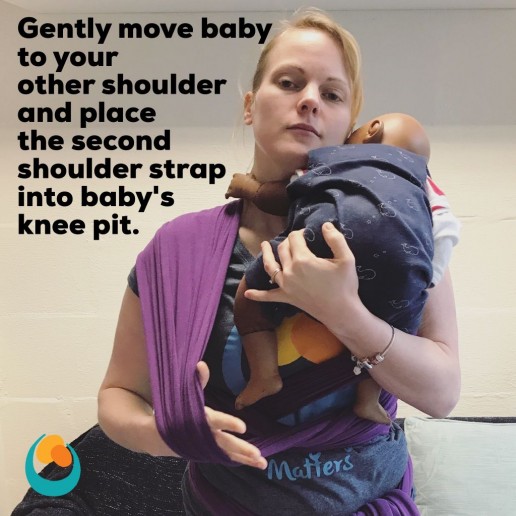
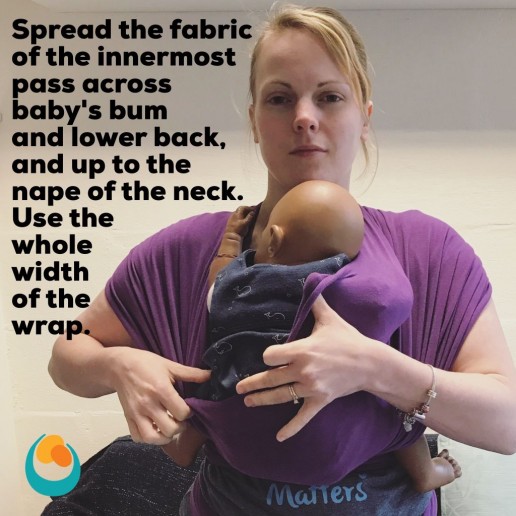
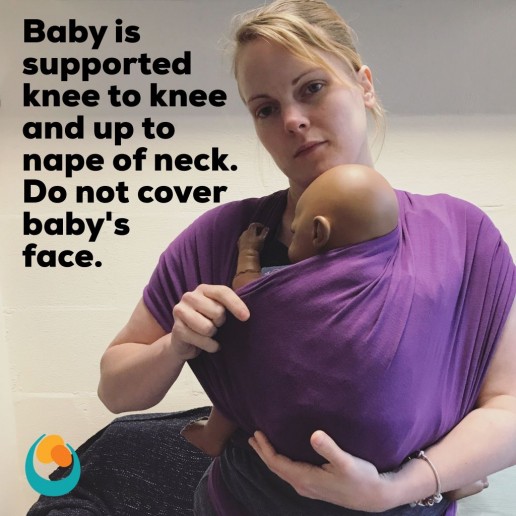
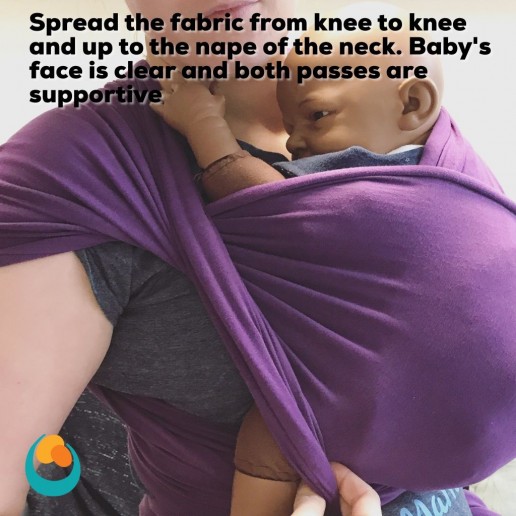
A step by step stretchy wrap photo tutorial guide; this is a two-way stretchy wrap. Two-way stretchy wraps stretch along their width and their length.
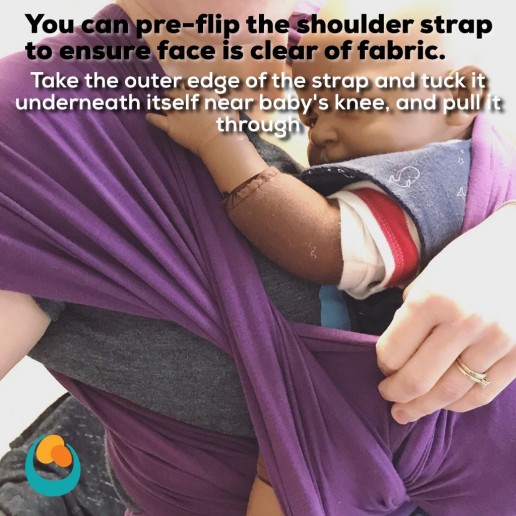
The key to success is in preparation; getting the tension right before baby goes in, and ensuring their position is right before spreading any fabric. This helps to avoid slumping or slipping. It gets easier with practice! Click on the images to make them larger for easier viewing.
If you have a very small or premature baby, or one who is keeping themselves very tightly tucked and isn’t opening their hips at all, please see your local sling professional for some extra support for using your stretchy wrap.
Below is a video for how to take baby out without needing to untie the wrap each time, making it very convenient.
Here is a video of the same technique, with the shoulders being flipped afterwards.
Here is a short video of the pre-flipped shoulder.
How to take a baby out of a stretchy wrap simply, without retying. This makes it very easy to leave on and just pop baby back in later.
If your baby seems to slump over or is deeply asleep, here is how to “unfurl” them so their chest rests safely against yours.
You can find information about other types of carriers in our Guide to Slings (with photo tutorials for a woven wrap front carry and a ring sling carry).
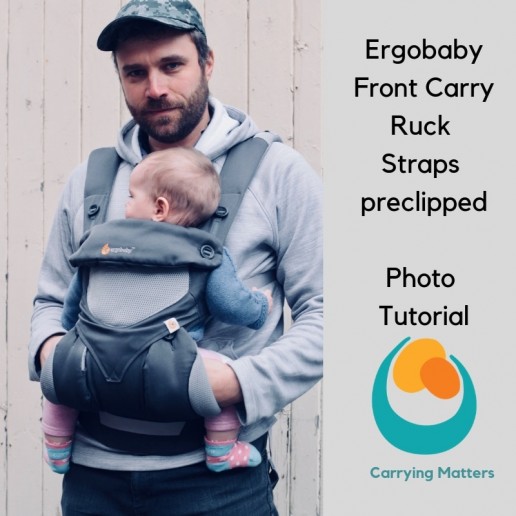
Ergobaby front carry ruck straps photo tutorial with pre-clipped straps
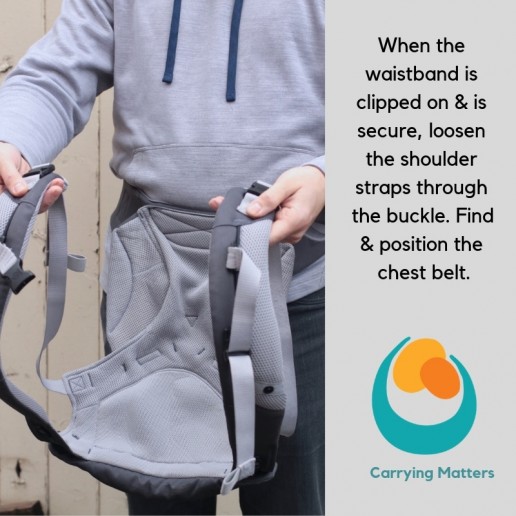
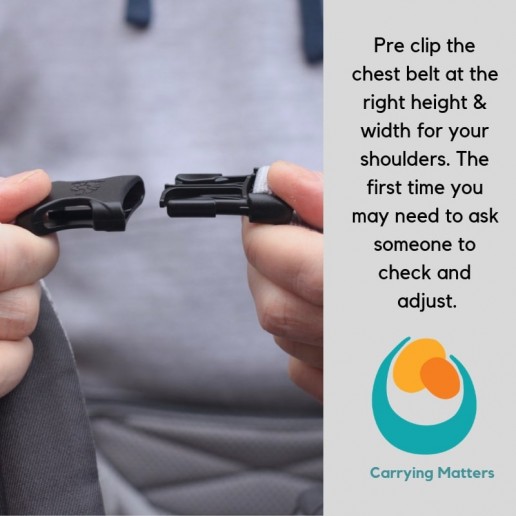
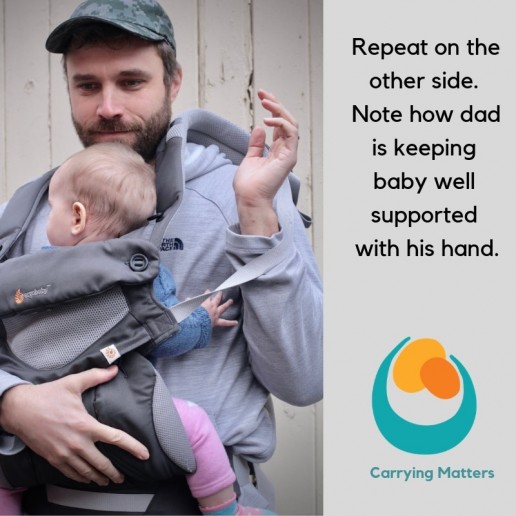
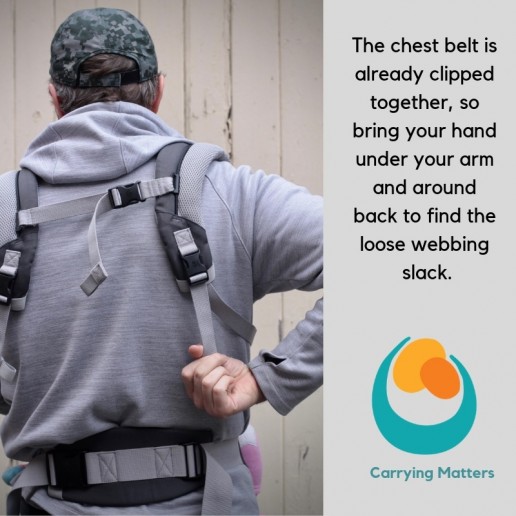
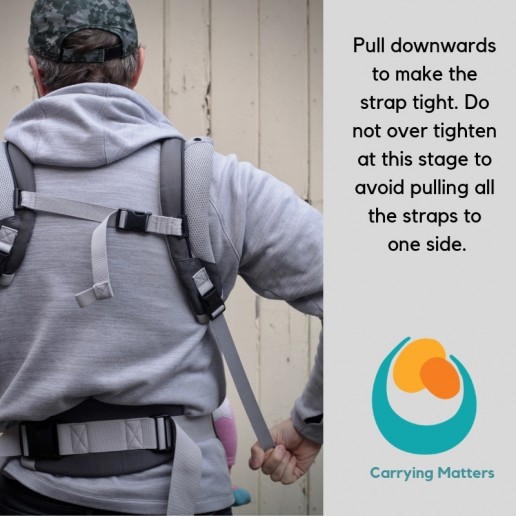
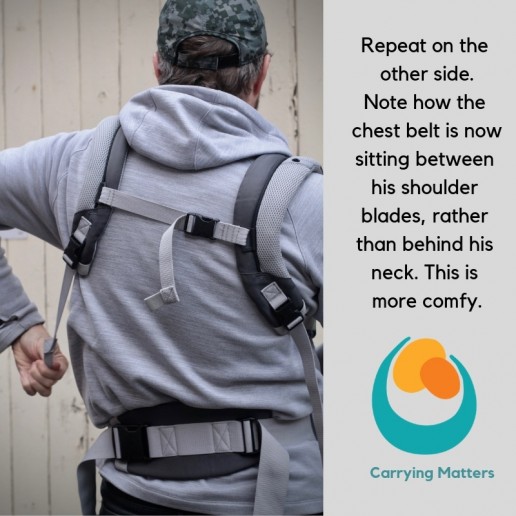
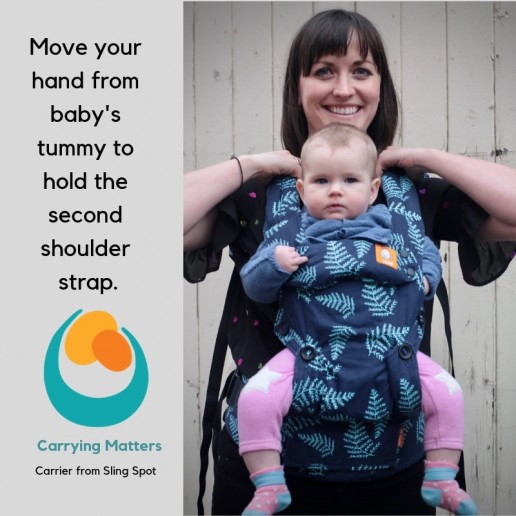
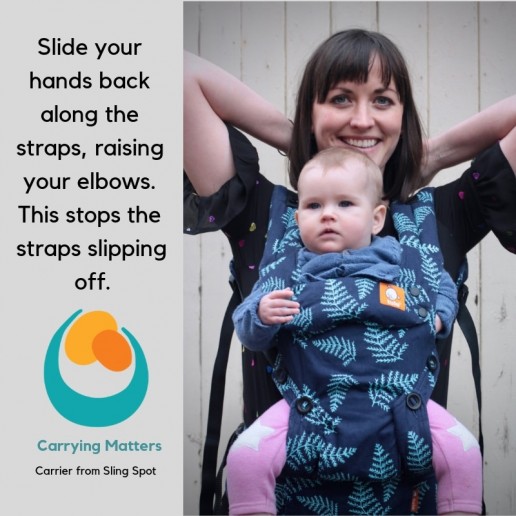
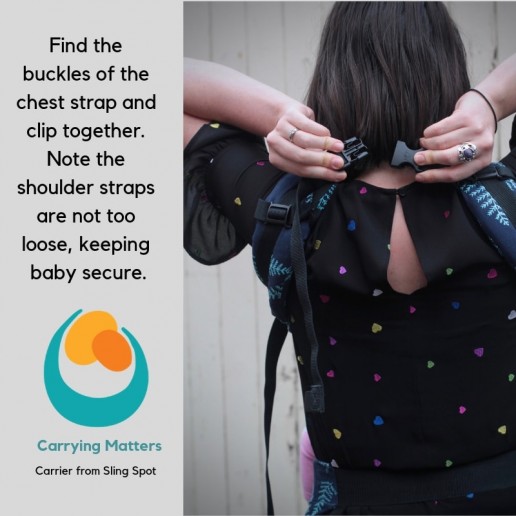
Ergobaby front carry ruck straps photo tutorial. A step by step guide to give you confidence! This method clips the chest belt at the start so it is preclipped into the optimal position.
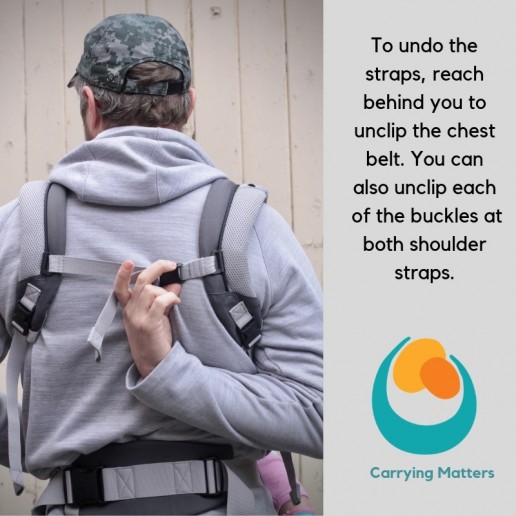
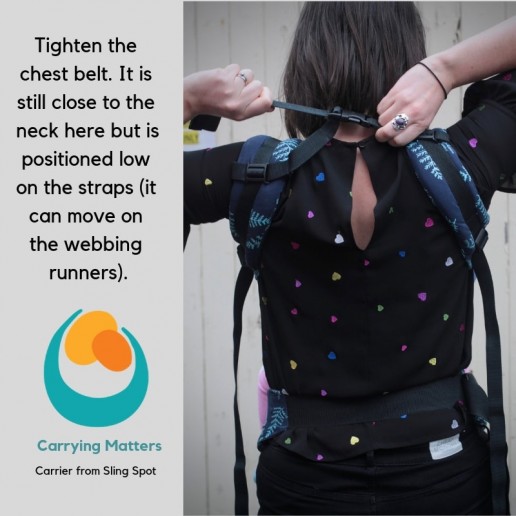
Many parents find it hard to do up the chest belt of rucksack strapped carriers. This may be due to how flexible they are (or aren’t!) and how easy they are able to reach behind their neck. Some find this pre-clipped method easier.
Top tip: don’t forget you can move the chest belt up and down on the webbing that runs along the shoulder straps. Everyone will have a particular preference for the chest belt location. As you tighten the shoulder straps, the chest belt will move down your back. If it still feels too high behind your neck once the shoulder straps are tightened, move it down the webbing for the next time. Check you can still reach it to undo it when ready. If it is too low, move it up the webbing for the next time. A few practices and you’ll soon find the right combination for your comfort and convenience.
You can see the clip behind your neck method here.
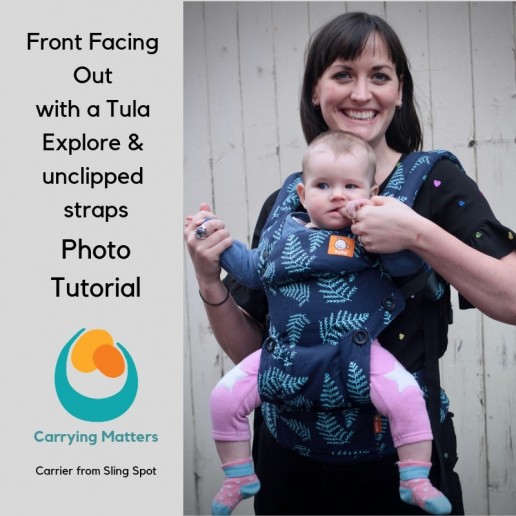
Tula Explore front facing out photo tutorial
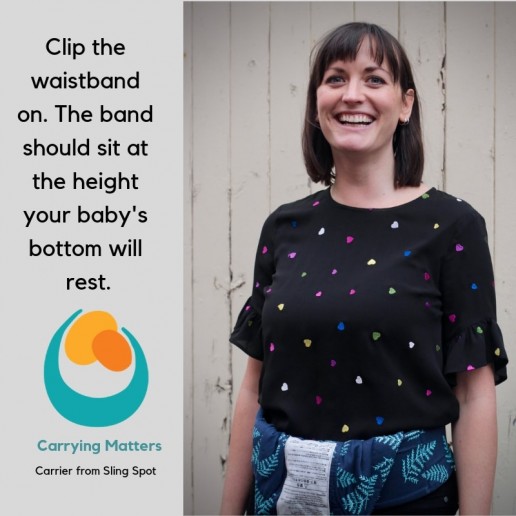
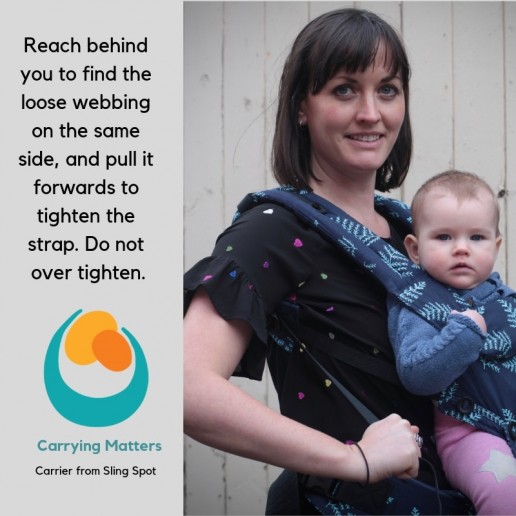
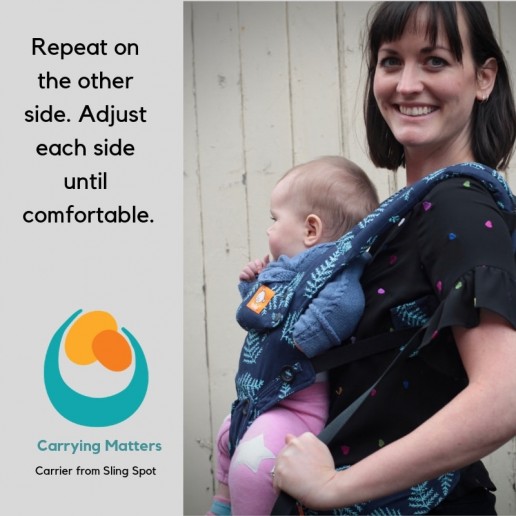
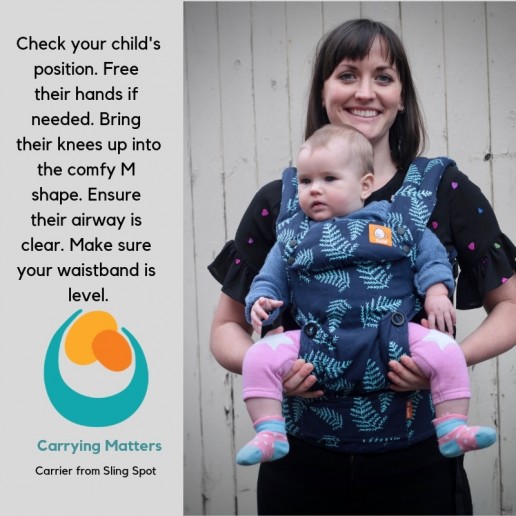
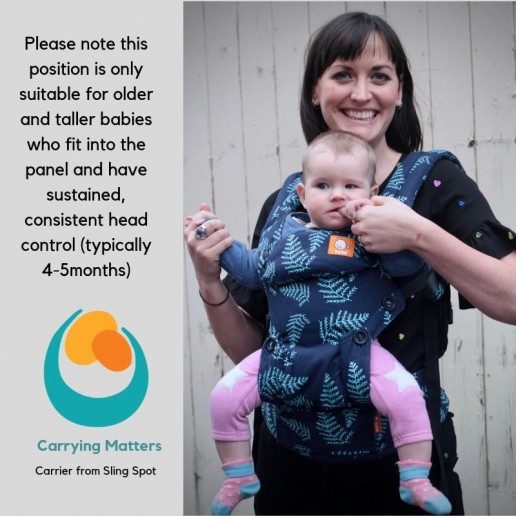
Tula Explore Front Facing Out photo tutorial with ruck straps. A step by step guide to give you confidence! This method clips the chest belt up behind the neck, after child and carrier are in position.
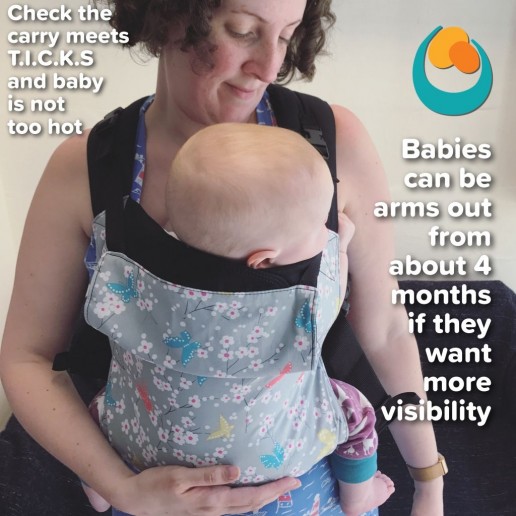
The Tula Explore carrier can be used facing forwards when baby is developmentally ready. Deciding if you want to use this position and when your baby is ready for it will be a very individual choice. Guidance suggests that baby should have well-established, independent and sustained head, neck and upper body control (for more than twenty minutes). Typically this develops around 4-5 months. Before this, there is a risk that baby may slump and compromise their airway, especially if they fall asleep in this position.
Furthermore, baby needs to be tall enough to fit into the structured panel, and their legs long enough to sit comfortably in the bucket seat. This little model is six months, and just big enough for this carrier.
Top tip: don’t forget you can move the chest belt up and down on the webbing that runs along the shoulder straps. Everyone will have a particular preference for the chest belt location. As you tighten the shoulder straps, the chest belt will move down your back. If it still feels too high behind your neck once the shoulder straps are tightened, move it down the webbing for the next time. Check you can still reach it to undo it when ready. If it is too low, move it up the webbing for the next time. A few practices and you’ll soon find the right combination for your comfort and convenience.
You can see the preclipped method here.
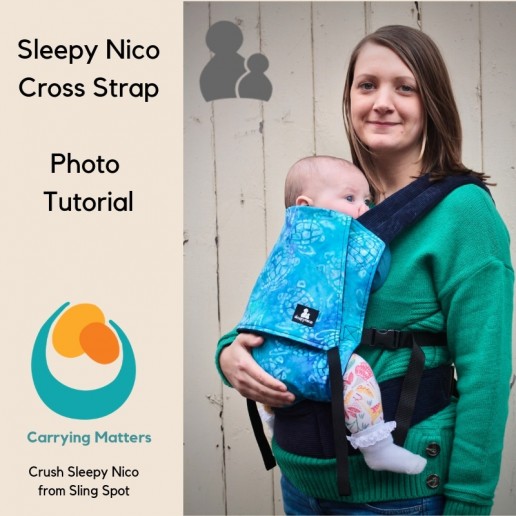
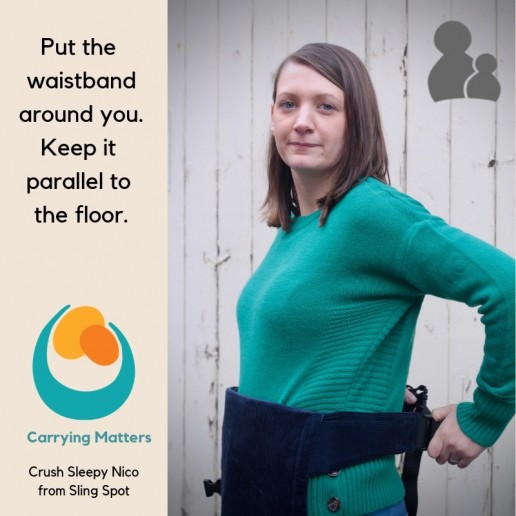
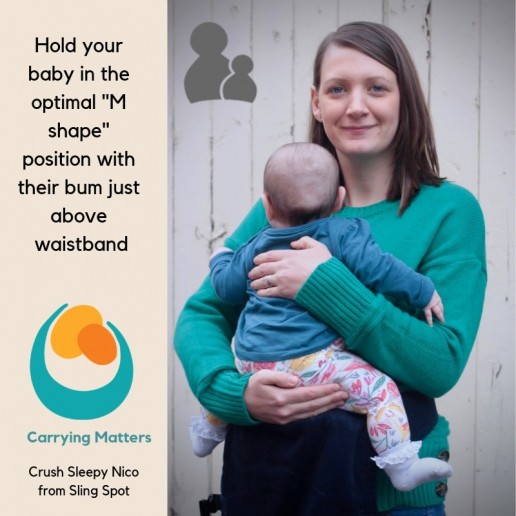
Sleepy Nico front carry with cross straps photo tutorial
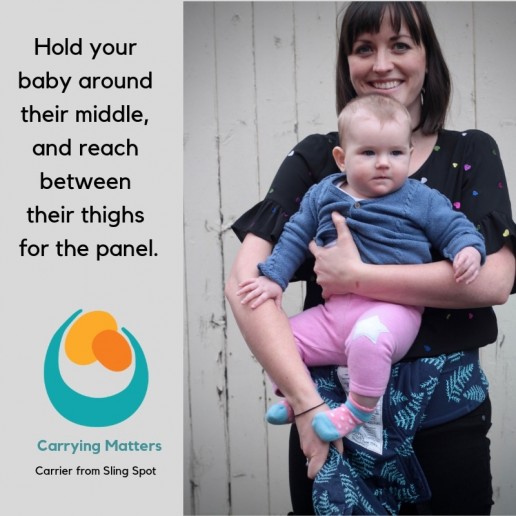
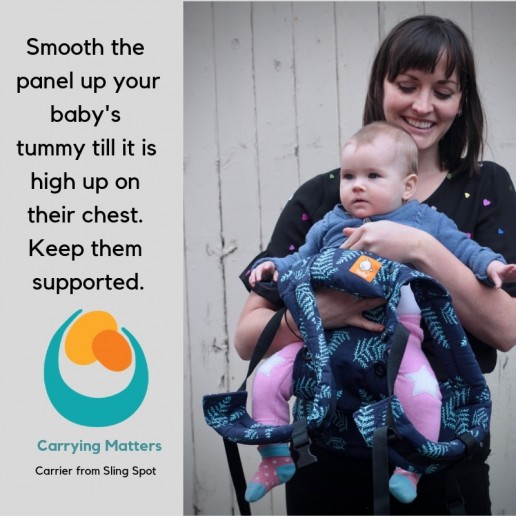
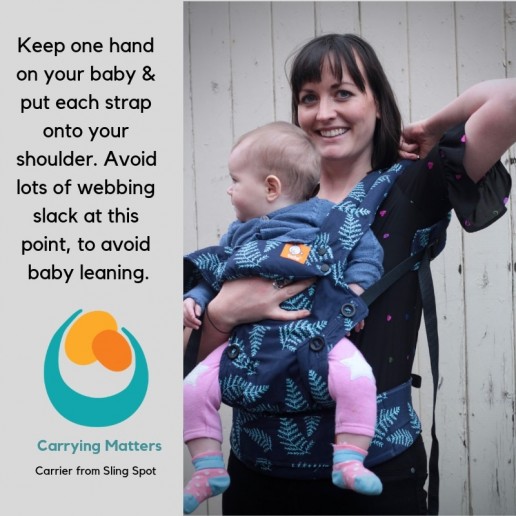
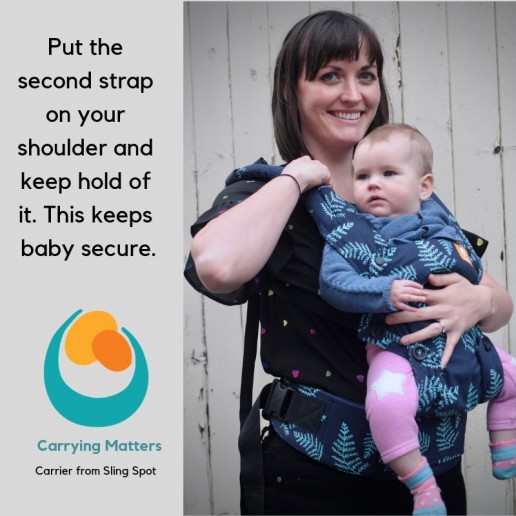
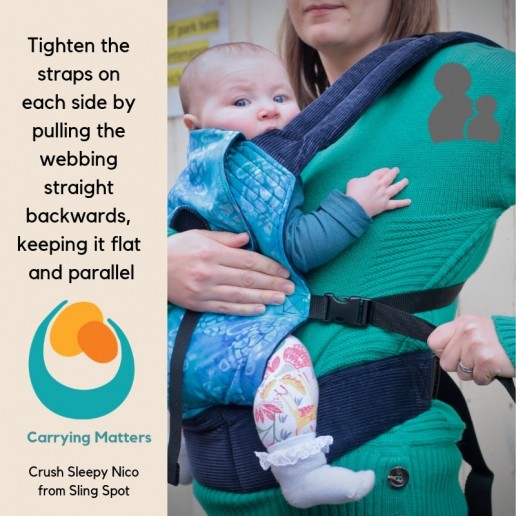
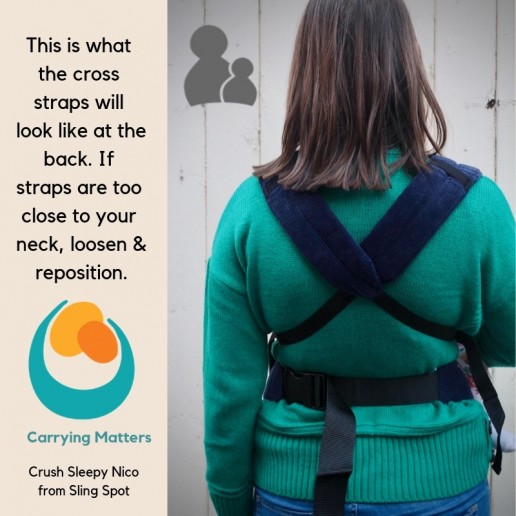
Sleepy Nico Front Carry with cross straps photo tutorial; a step by step guide to give you confidence!
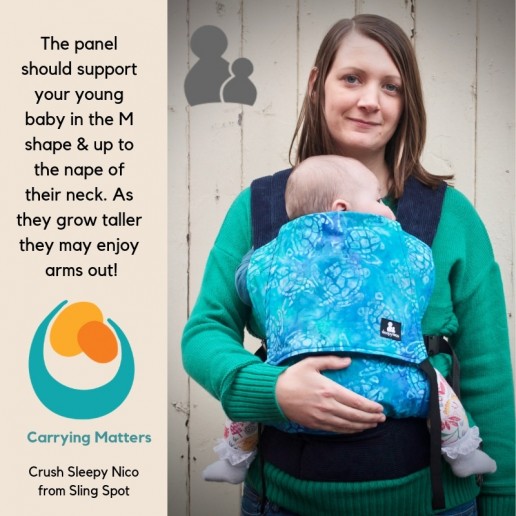
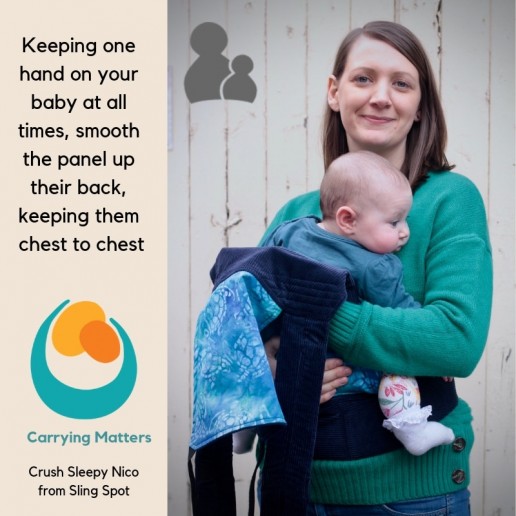
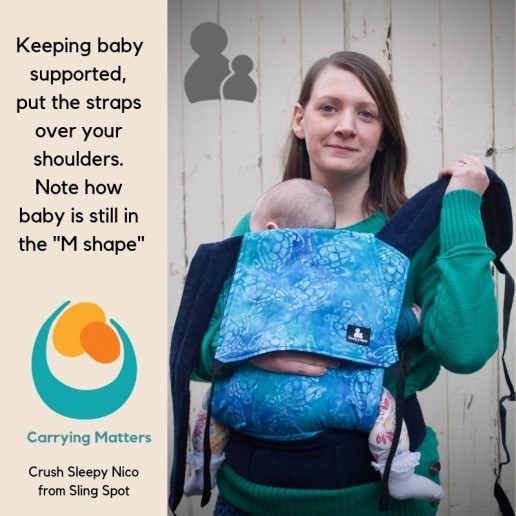
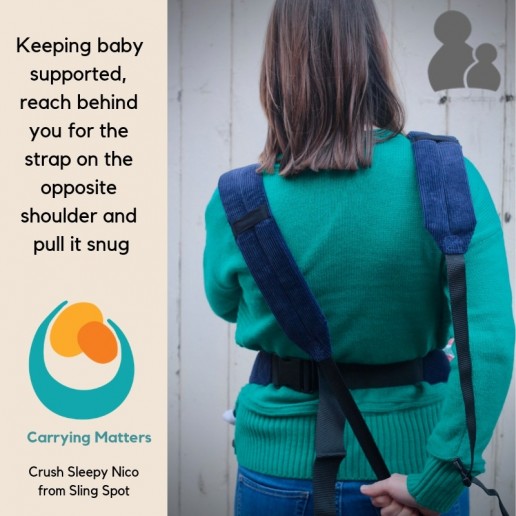
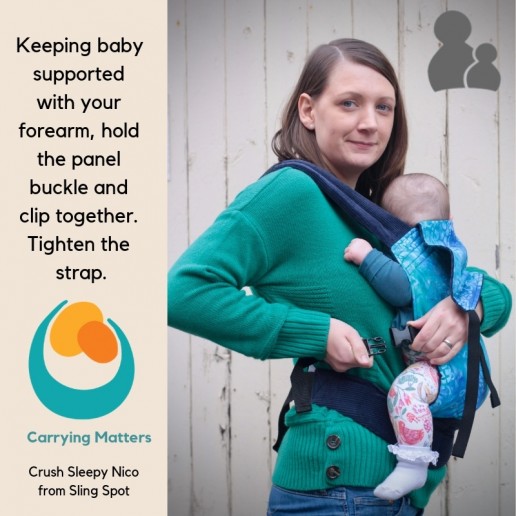
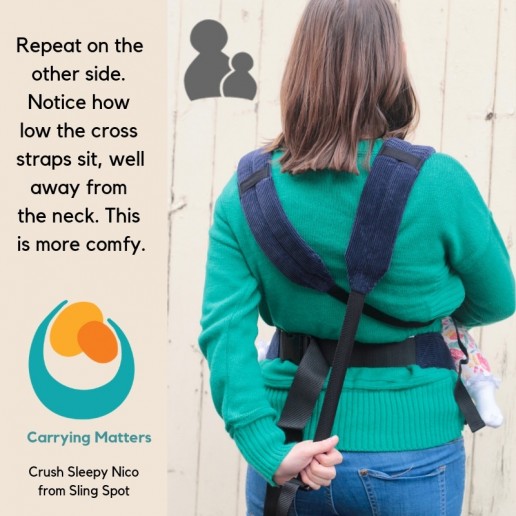
The Sleepy Nico carrier can be used from 10-12 weeks to toddlerhood. It can be used for rucksack straps too, and back carries from about six months. This carrier is the Crush (duuuude!) fabric from Sling Spot.
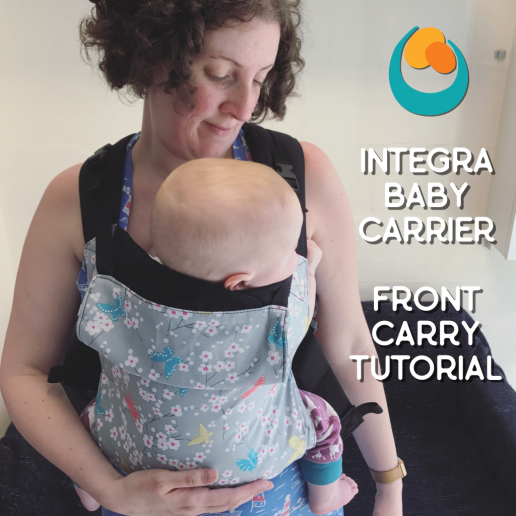
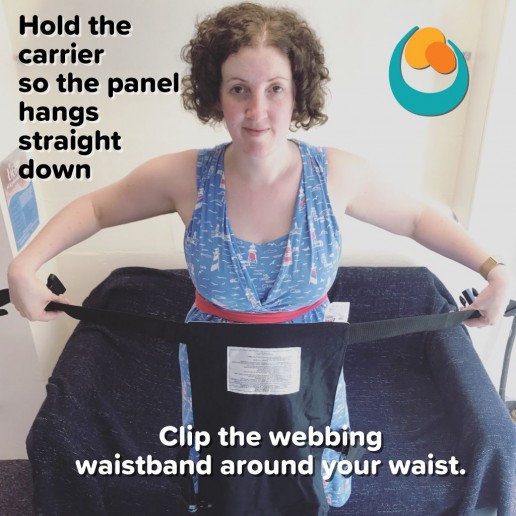
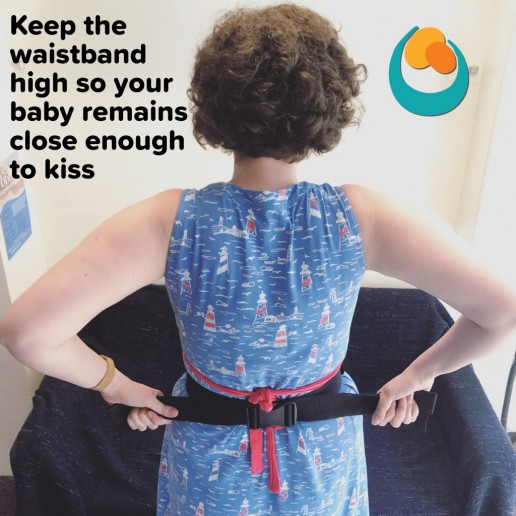
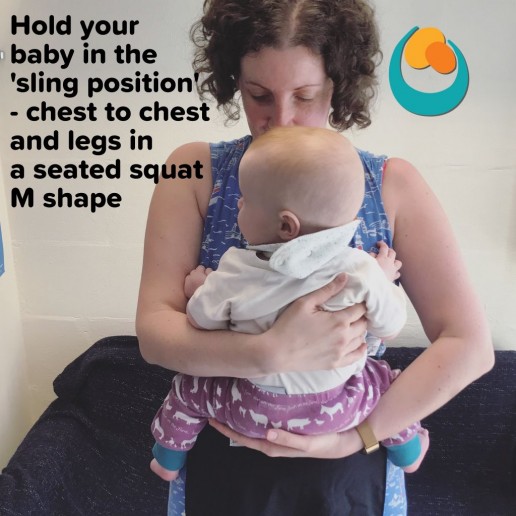
Front carry with an Integra Baby Carrier tutorial (cross straps)
Our front carry with an Integra Baby Carrier tutorial (cross straps) with an older baby will help you feel confident, safe and secure.
With a newborn to about four months, please use the included accessory strap to cinch the panel at the base. (This will have the effect of making the panel narrower and shorter so it fits around your baby's body.)
This method applies to any waistbandless carrier where the panel hangs straight down from the webbing like an apron.
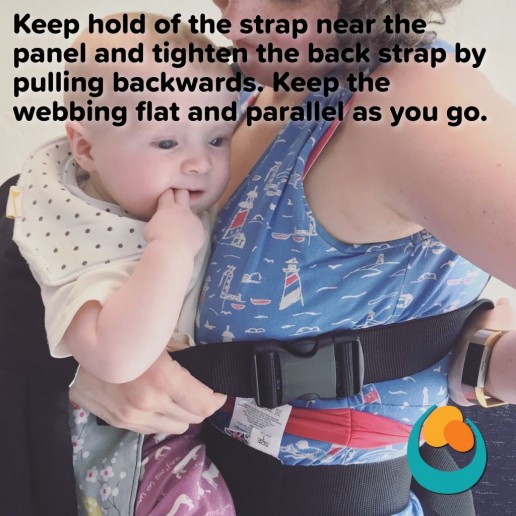
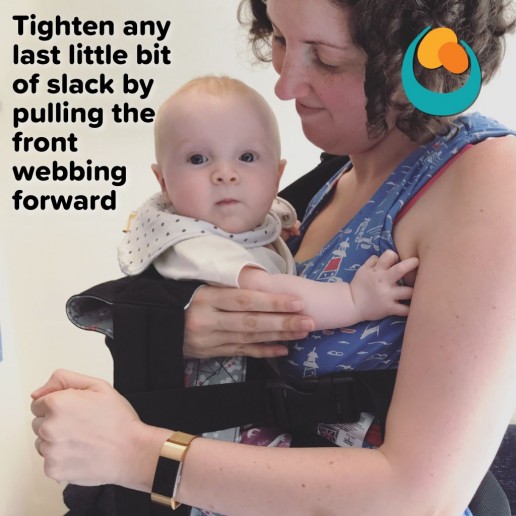
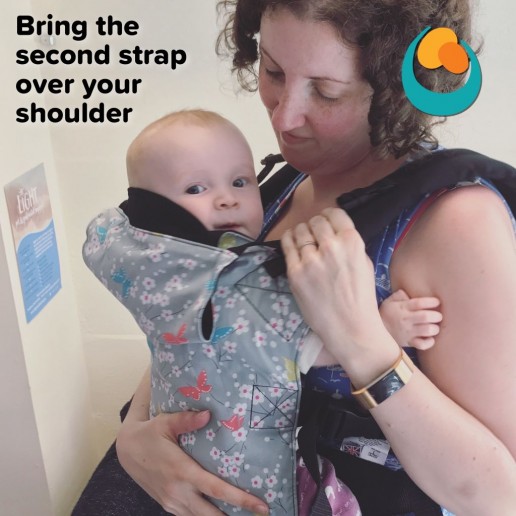
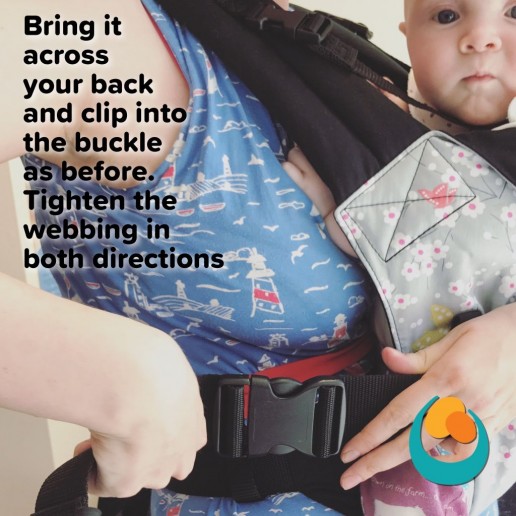
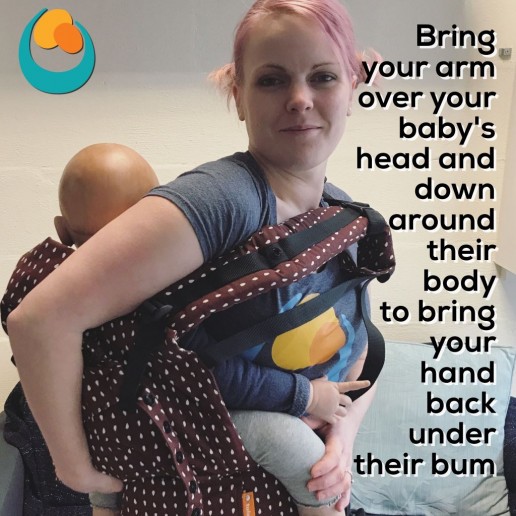
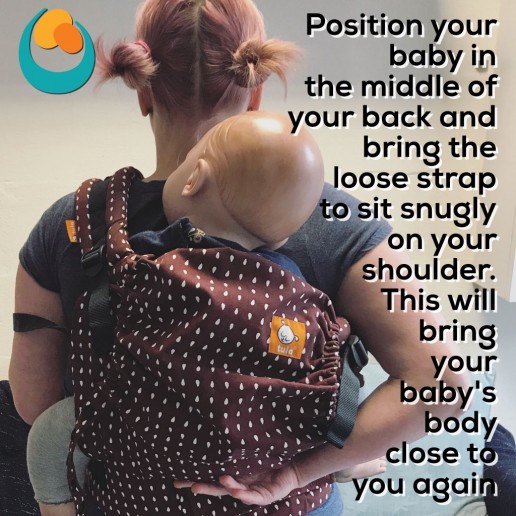
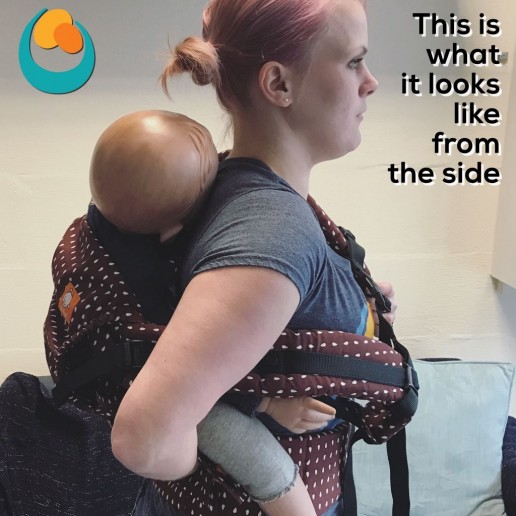
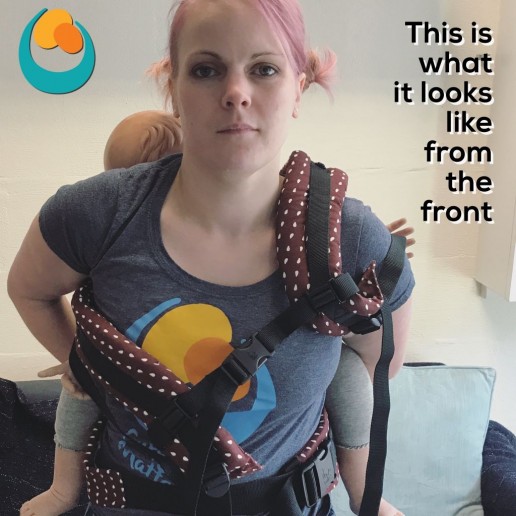
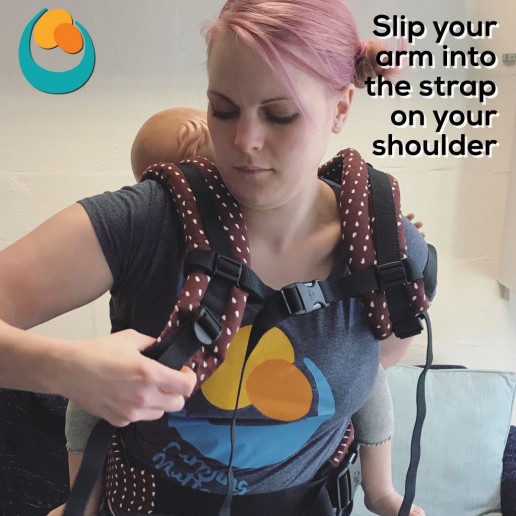
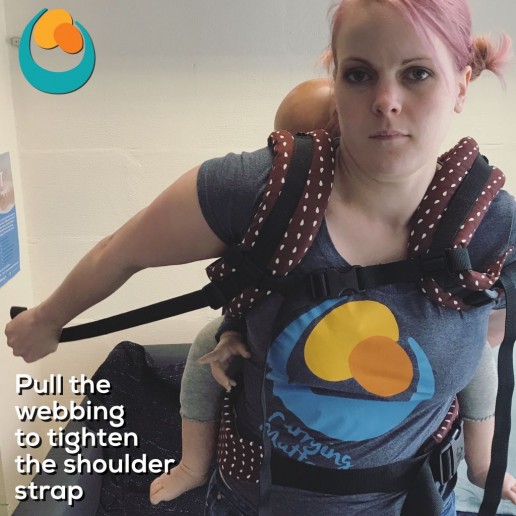
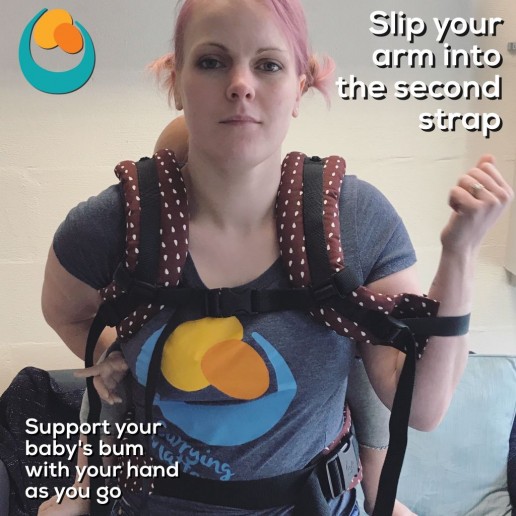
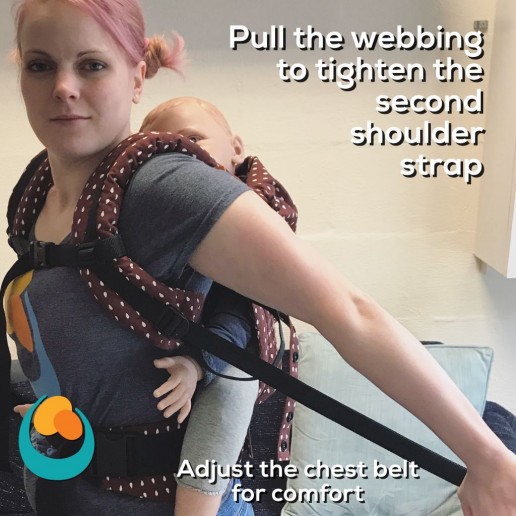
Back carry with a rucksack carrier photo tutorial - "One up One Down"
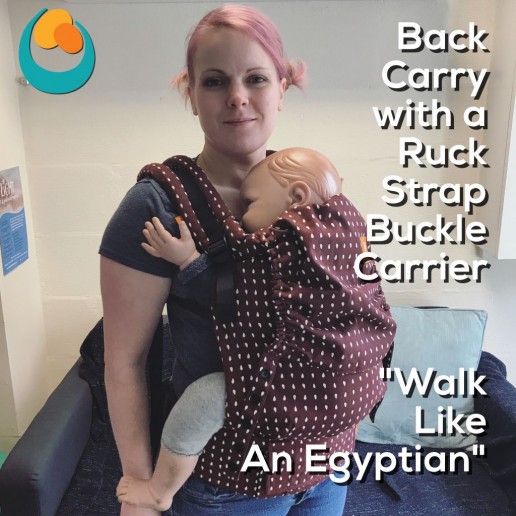
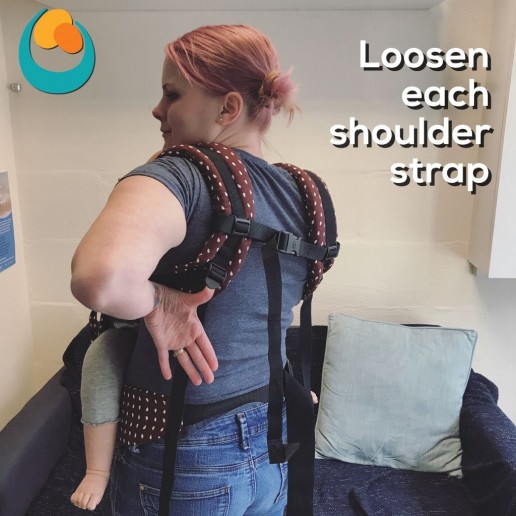
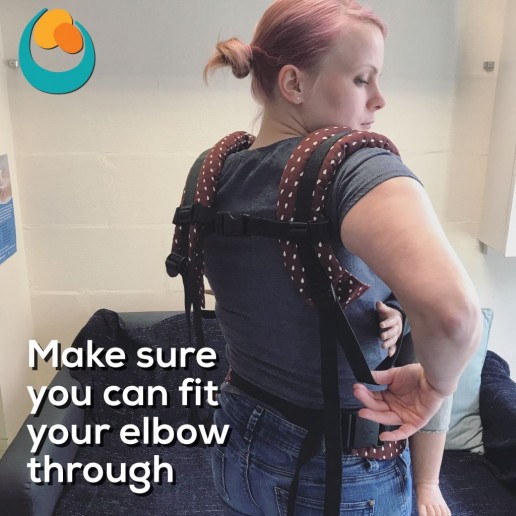
Learn how to safely do a back carry with a rucksack carrier with this one up one down (used to be known as the"walk like an Egyptian") method.
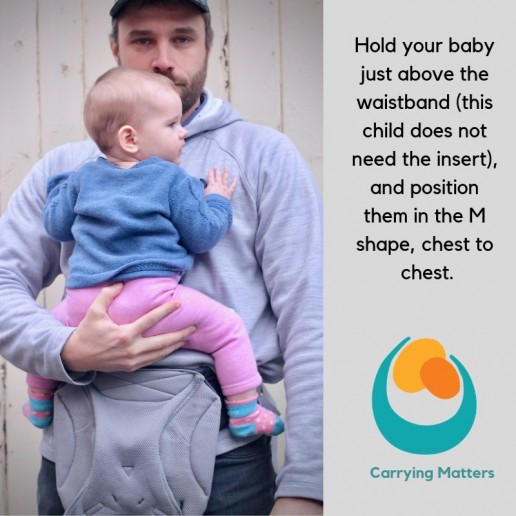
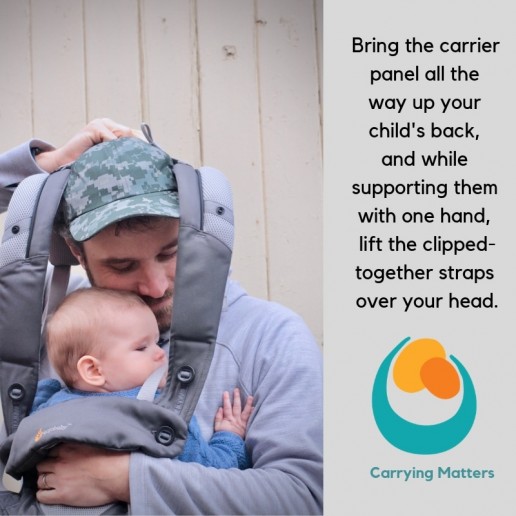
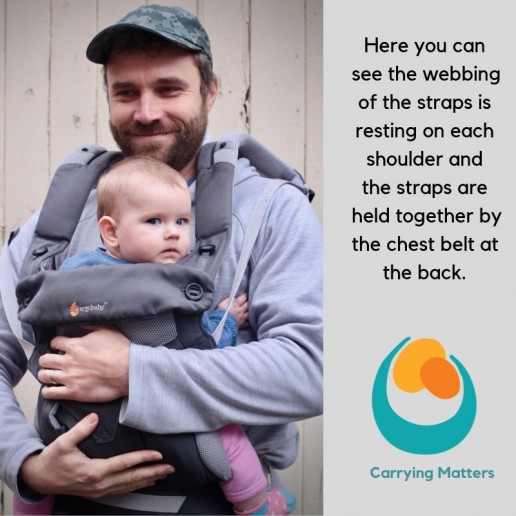
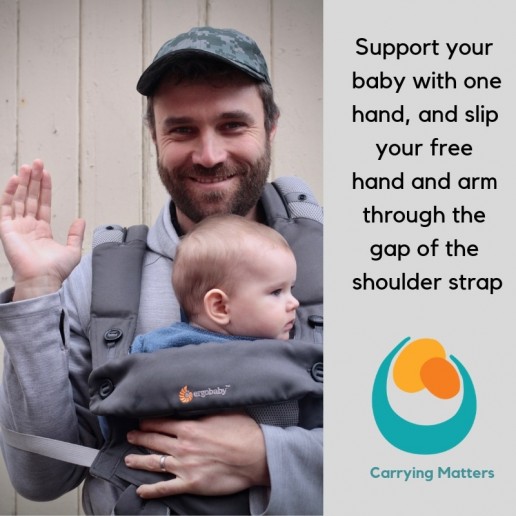
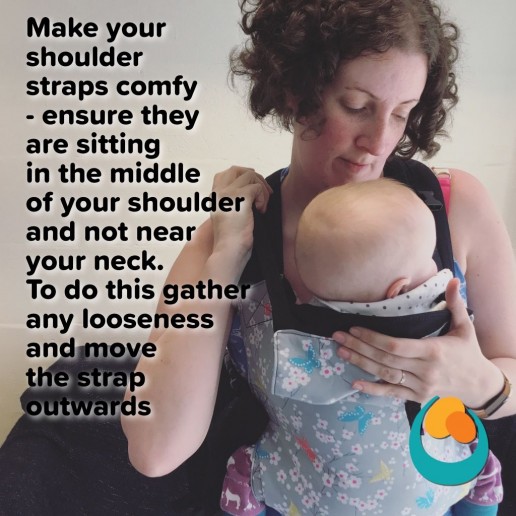
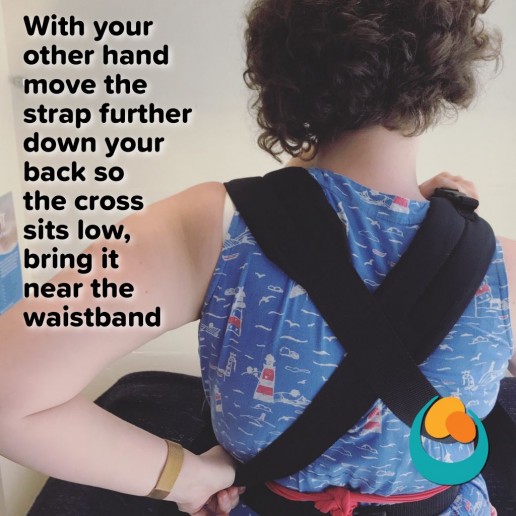
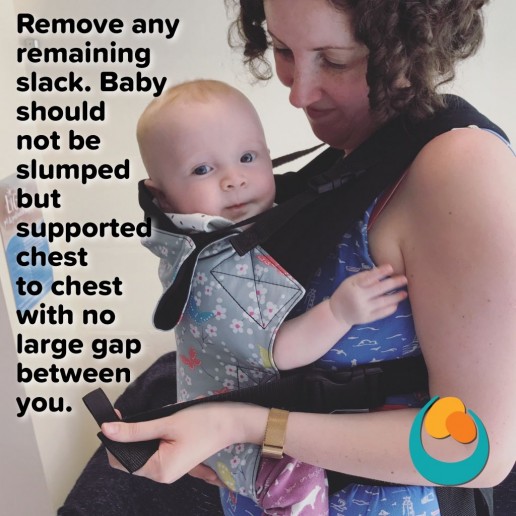
The straps are worn like a rucksack and the chest belt remains done up at all times. Each arm is threaded out of the shoulder straps one by one; first one comes up and forwards, the second comes down and back, “one up, one down” method. The chest belt is not a source of weight bearing support so please keep one hand on your baby at all times as seen in the photos.
Baby should be old enough for back carries in your buckle carrier that fits them well. Read more about this here.
Please see your local carrying consultant or sling library for help if you are unsure. It is wise to practice with some help and in front of a mirror the first few times!

